BMW motorcycle exhaust pipes and finned nuts |
|
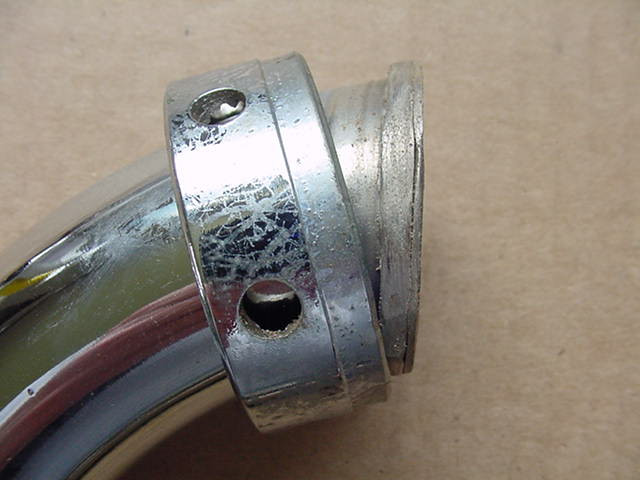
This page applies to all models after the war up to the mid 80s. BMW has used two basic types of exhaust nut. The BMW R50, R60, R50/2 and R60/2 type exhaust nut and gasketAll BMW motorcycle singles and twins (except the R50S, R68, R69 and R69S sport models) had a simple exhaust nut and gasket. The nut was captured and couldn't be removed from the exhaust pipe. The pipe was crimped over to make a mating surface for the gasket. That crimp prevented one from removing the nut from the pipe.
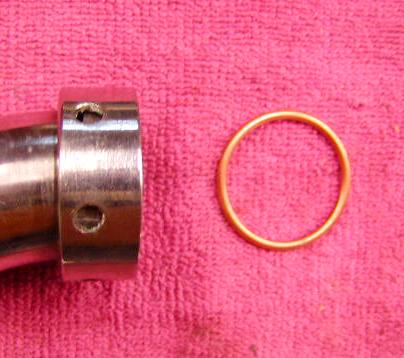
Photo by Lonnie Walker, thanks The nut shown here is not a BMW motorcycle part. It is some after-market part item. I have no idea how it is "captured" as the photo doesn't show it. The copper gasket is a crush type and "fills" any minor mismatch in the pipe to head fit. I have seen them so bad that I had to use two gaskets to seal the exhaust. Many times I have had to loosen the lower exhaust mounts to get enough "play" for the nut to thread onto the BMW head. Get and keep a few of the copper gaskets, even though they are usually reusable.
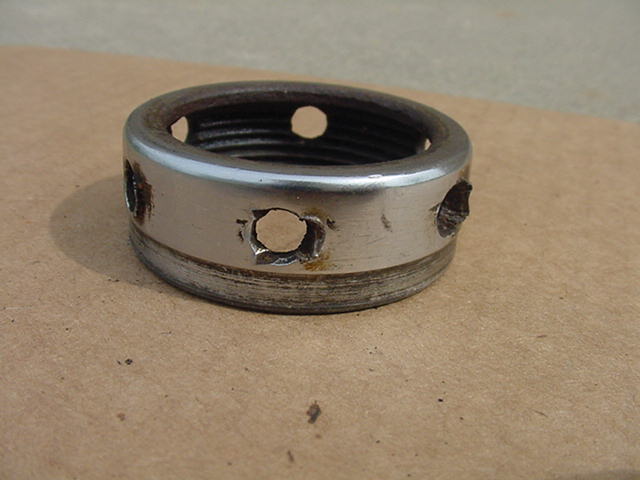
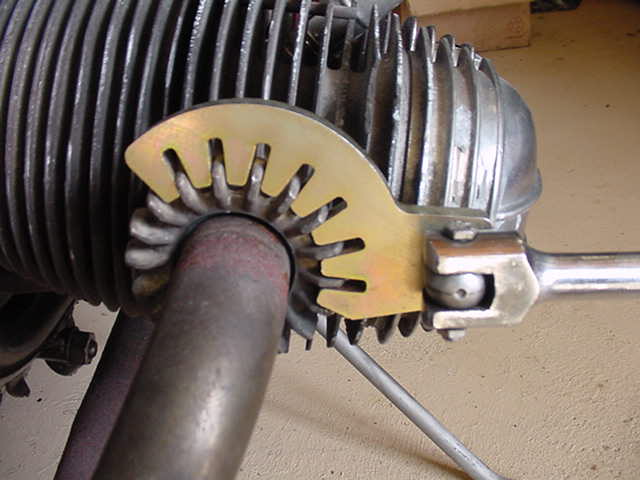
This is a stock BMW exhaust nut from a /2. The threads are in great shape and I use this tool with grinding compound to "clean" up the bad threads on a head. It isn't as good as the proper die, but far better than nothing. You can see that this nut is quite different from the one shown above. This shows the damage done when failing to use the proper tool. Some idiot used a punch and screwdriver to remove and install the exhaust ring. The damage to the ring is bad enough, but is not the whole story. The pin wrench supplied in the /2 toolkit works very well on this nut, but not the finned one. It applies "lifting pressure" as well as rotating pressure. This tool will remove the ring easily and if someone tried the same ring with a punch and hammer, it would not rotate well. It would need to be pounded all of the way off. This needless stress easily damages the BMW head exhaust threads. The exhaust threads on the butterheads are weak enough already, they don't need to be mangled further by use of an improper tool. The problem with this type BMW motorcycle exhaust nutThe sealing of this type joint is accomplished by pulling the flared flange of the exhaust pipe tightly against the head. It depends mostly upon the two surfaces being parallel. The copper crush gasket can only seal up a small error. It is often necessary to loosen up the pipe at the motor mounts to allow it to "fit" the exhaust port on the BMW head. Sometimes the curve in the exhaust pipe isn't exactly perfect to make it fit properly. When all is tightened up, great pressure is exerted on the exhaust threads. The sport models with the exhaust system actually inserted into the head is a far better sealing method. Far less "pulling pressure" is applied to the aluminum threads to get a proper seal. Thread file for use on BMW motorcycle exhaust threads
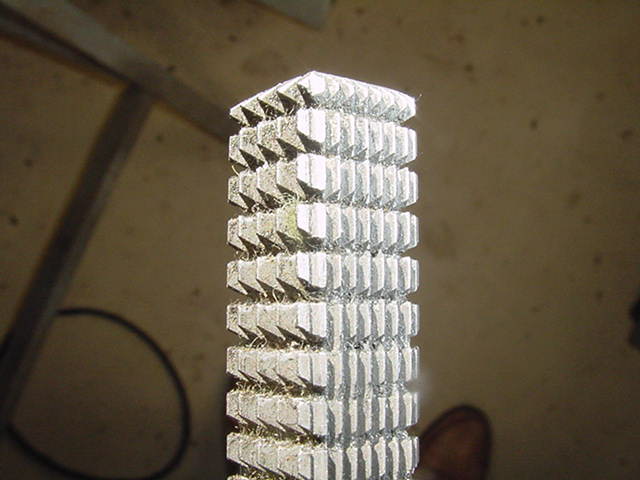
A metric thread file is also very useful.
A close up of a thread file. The teeth on the very end are made to go in and clean out "inside" threads.
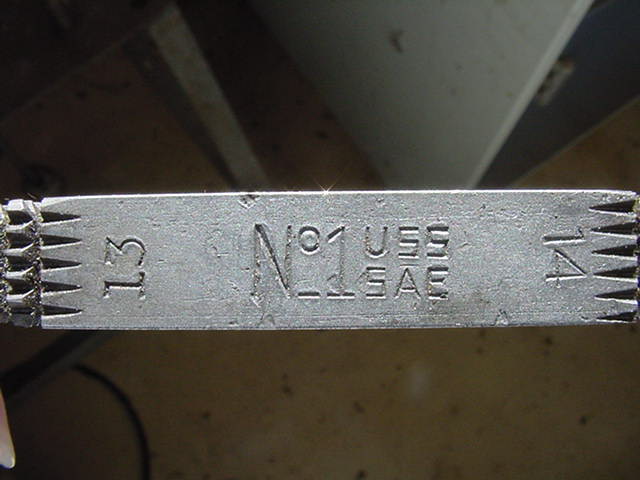
This thread file is American and shows the "threads per inch" as I couldn't find my metric file for the photos. To order a metric thread file: http://www.mcmaster.com/ part number 8309A11, $8.31 plus shipping or Reid Tool has on for $20.93 + shipping.
This is the brand new stock set up for the BMW R50/R60 types. If you look very closely, you would see a collar welded onto the crimped part of the pipe. This collar spreads out the pressure from the ring. Always use some type of anti-seize when reinstalling any exhaust nut on any year and model of BMW motorcycle.
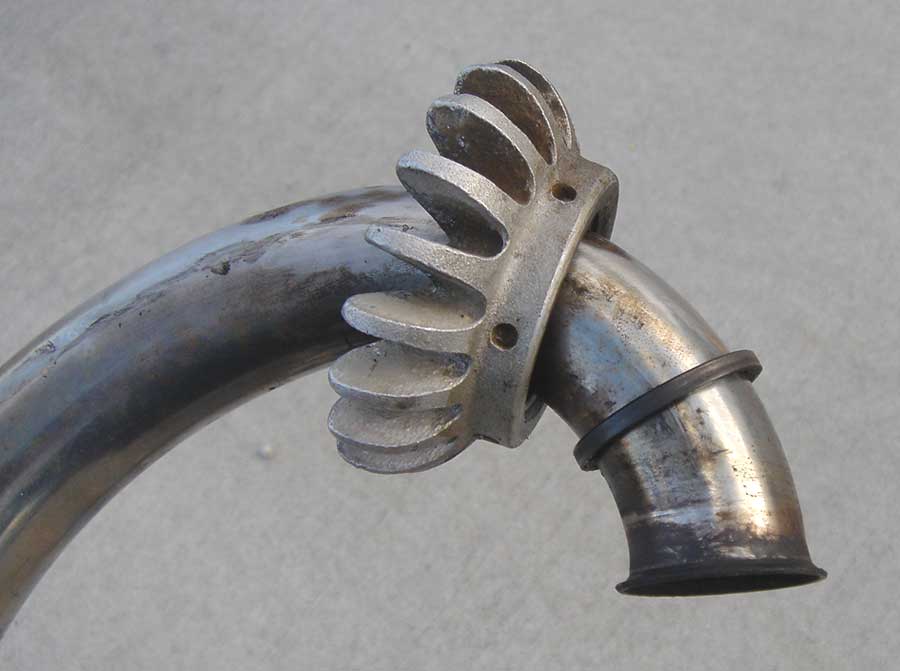
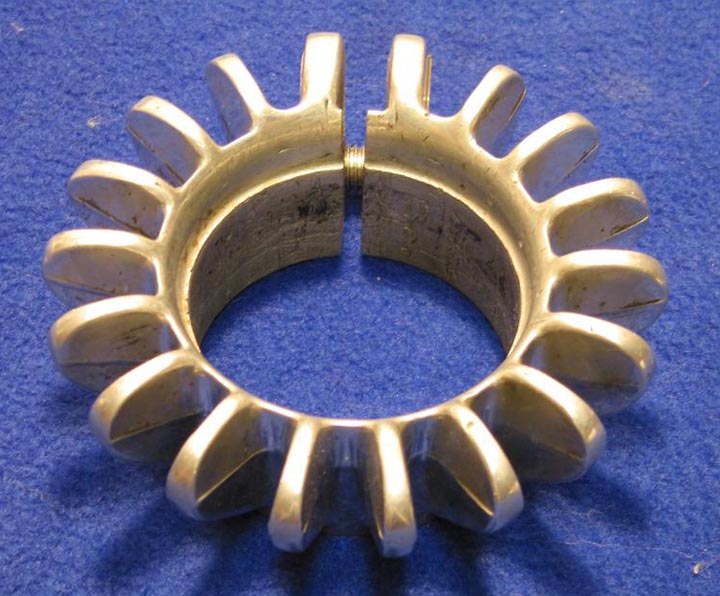
This is the unique exhaust pipe for the rare BMW R50S. It has the finned nut and the end with a flange. These are very hard to find in good condition because there is no way to get the finned nut on or off. It is captured just like the R50/R60 type. Photo by James Young, thanks. Visit his great website devoted to the Earles fork models.. Removing the exhaust nut from a R68, R69, R69S, R50S, /5 and laterThe whole issue of removing the exhaust nuts from a BMW motorcycle head has seldom been properly addressed. The tools available up to about 1970, were very poor. There are two basic ways to get the nut off. Use a proper tool or cut them off. Both will be shown below.
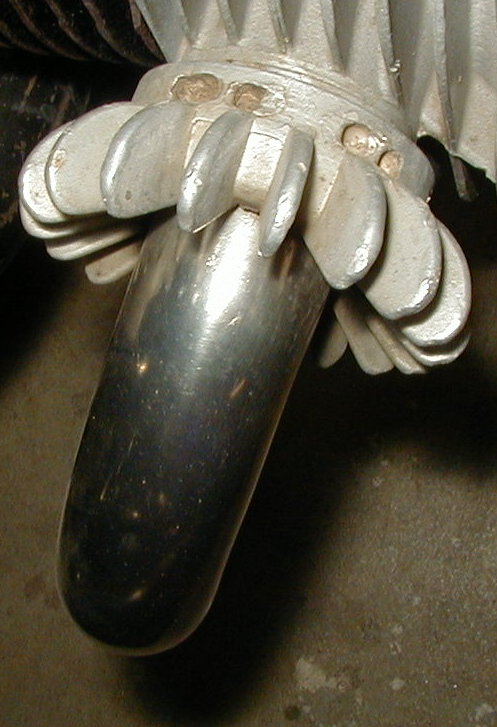
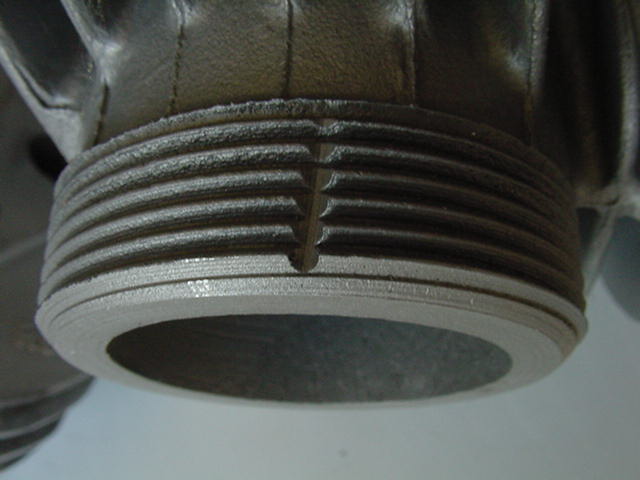
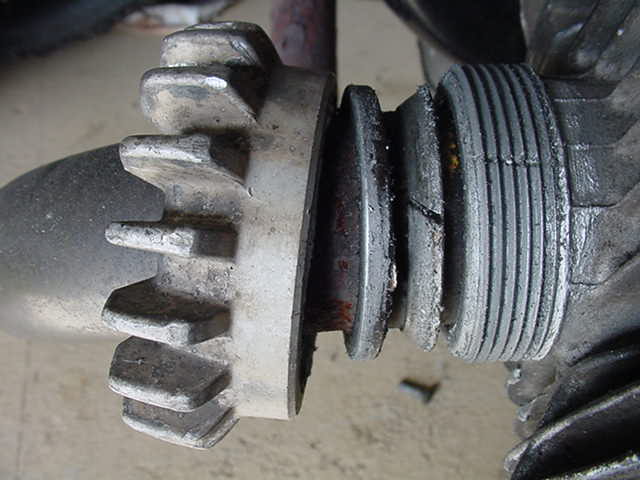
This is an exhaust nut on a BMW R69S. It shows that some PO (previous owner) ruined the original set of holes for removal. Then a second set were drilled and also ruined. Some people learn slowly and some never learn. This could well be the result of using the tool provided in the BMW motorcycle tool kit. More about that below. In 1970 BMW came out with a new series motorcycle series called the /5. From then on, all exhaust pipe fasteners were of one kind. They copied the very successful former "sport" model system. The exhaust pipes go into the BMW head about an inch (25 mm) or more and are held in by the exhaust nut. It is finned for cooling and is cast out of aluminum.
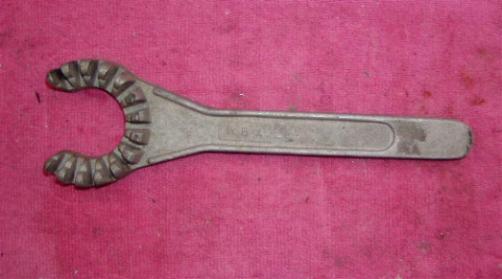
BMW motorcycle exhaust nut from 70-71 and tool provided in the BMW tool kit. See the holes for the tool?
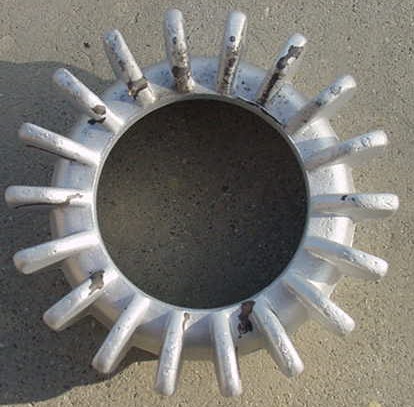
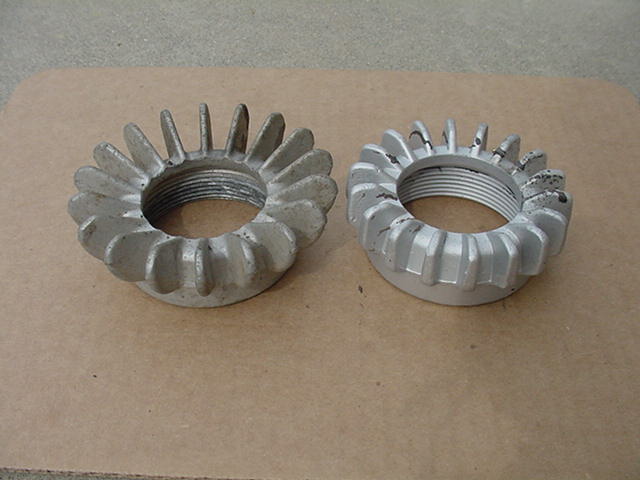
Exhaust nut typical of the late 70's with "shorter" squared off fins
On the left is a /5 nut with the longer rounded fins. This is the later one without the holes for the pin wrench. On the right is the late 70's type, also shown in the photo above. The one on the right has just been glass blasted and the one on the left has not. To remove the nut takes a special tool. The tools have been made in several varieties and most work. The one supplied in the BMW tool kits were nearly useless.
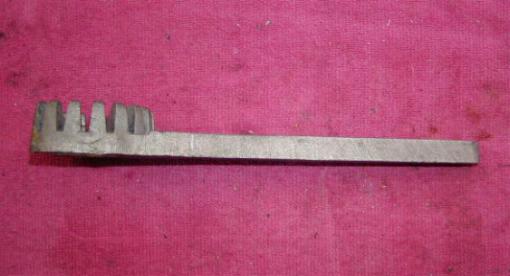
This tool is from a BMW motorcycle tool kit and it works very poorly for removing the finned exhaust nuts. The curve is wrong and it is accidentally made to actually lift the round pin on the end out of the hole as pressure is applied. When the round pin is only partly in the hole, it easily tears out the metal. One can grind the inside of the curve to get a proper fit.
The "Matra" tool that BMW provided to motorcycle dealers. The curve is correct, unlike the one in the tool kit, but it still applies all pressure to one hole. That is what can rip out the hole. The early /5 BMW motorcycle had exhaust nuts that still had 6 holes for a pin wrench similar to the ones shown above. That had been standard for many years. The curve on the BMW motorcycle tool kit wrench is wrong for the /5 and later nut. In the first days of the /5 we just ground our tool to fit and it "sort of" worked. It is the wrong way to go and will pull the aluminum away from around the pin hole. A new tool soon came out and then the nuts had no pin holes to fit the tool in the tool kit. BMW had a tool made out of cast iron. It was long and heavy. Many after market tools have been made out of aluminum and are lighter. They often break.
This is a "short" version of an aftermarket tool. Photo supplied by Lonnie Walker, thanks.
This is a homemade tool from Australia, by Steve Doyle, thanks. It is made with several bolts welded onto the curved piece.
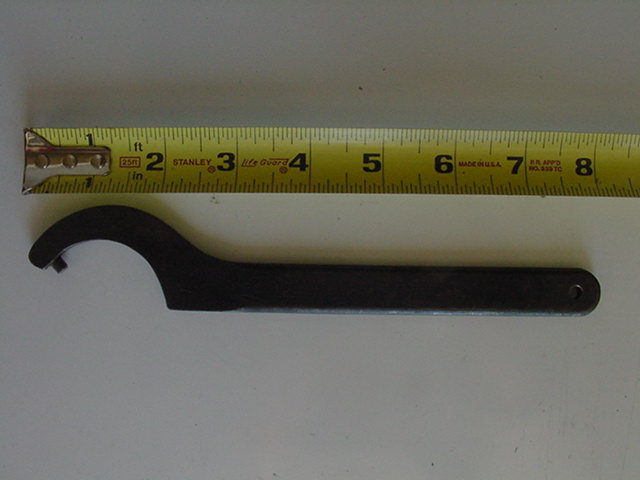
This BMW motorcycle exhaust nut tool is made by Ed Korn and it works very well. It is the best that I have used. One needs a 3/8" drive handle.
Ed's tool in operation
Make sure that the teeth are fully meshed and tight. You may have to use a lever to "straighten" one or two fins so that the tool will fit properly. To crack a nut loose, one has to hold the tool well engaged in the teeth with pressure in the direction of removal. It may come loose with some arm pressure. If not, then one should use a plastic reboundless hammer. After it is loose, the nut must only be removed by hand and without the use of a hammer. There is a great risk that the threads will gall. They are aluminum against aluminum. If it seems to get tighter while rotating it off, stop. To continue is to risk ruining the threads on the head. To replace a nut is cheap, but fixing the head is not cheap. The nut must be cut off with a hack saw. Cut the nut at two places (on opposite sides) and only saw down "to the threads" of the head. Now use a chisel in the saw cut to break the two pieces off. When you get one cut finished, try to spread it apart and get the nut off. Often it will come off at that point. If not, then make the second cut.
This is what happens when one cuts too deeply into the exhaust nut with the hacksaw. Installing the BMW motorcycle exhaust systemThe best method is to install the exhaust pipes and then the mufflers. Run the exhaust nut onto the head by hand to insure that the threads work. Clean up as necessary to get it to go on smoothly. The threads on both sides should be prepared with some type of anti-seize compound before installation. That will increase the chance that the nut will come off easily the next time. Clean as necessary. Make sure that the ( sport type) exhaust pipe goes into the head easily. Be sure that you have the compression rings. If one or both are lost, get more of them. On the forward surface of the thicker ring where it mates with the exhaust nut, I use some anti-seize there too. It reduces the friction and allows it to turn more without stressing the threads. Tighten the nut up loosely. On the /2, one may add in the crossover after the exhaust pipes are loosely mounted. On the /5 and later, the crossover(s) should be mounted first and the assembly mounted to the heads. Now attach the clamps to the motor mounts. It may require tapping the long through bolt a bit from side to side to get them both on, however, that takes two persons. By myself, I just used adjustable pliers to grab the clamp and lift it up to the motor mount bolt. Leave the nuts loose. Mount the mufflers last and leave the fasteners loose. Now, tighten each fastener starting at the front. The motor mount nuts need to be fairly tight, as they play a dual role. The engine is a structural element in the frame design, so don't let the engine "move" around. Loose motor mounts may allow excessive engine vibration too. Clean the entire system of grease before starting it up. Foreign material (grease) may discolor the nice new chrome. Once the bike is started up, listen for exhaust leaks around each side. Now tighten the exhaust nuts as necessary to stop the leaks. You only want to tighten the nuts just enough to stop the leaks. The tighter that you tighten them, the greater chance of the threads galling later on. Do not exceed the book torque settings. If they leak after reaching maximum torque, then start over and carefully examine each part. Some of the anti-seize may run out as the system gets hot. Just wipe it off. Some believe that an owner should remove the exhaust nuts yearly to regrease them and insure that they will come loose. I disagree, any removal can gall the threads, so why risk it. Wait until you actually need to remove them. Buy and keep a spare exhaust nut for your model of BMW motorcycle. You will probably need it eventually. BMW sport motorcycle exhaust nut sealing rings
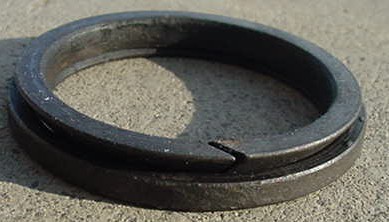
This is what the exhaust rings look like.
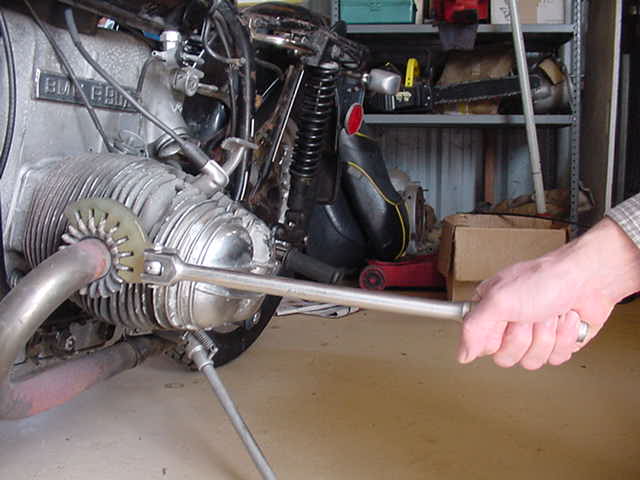
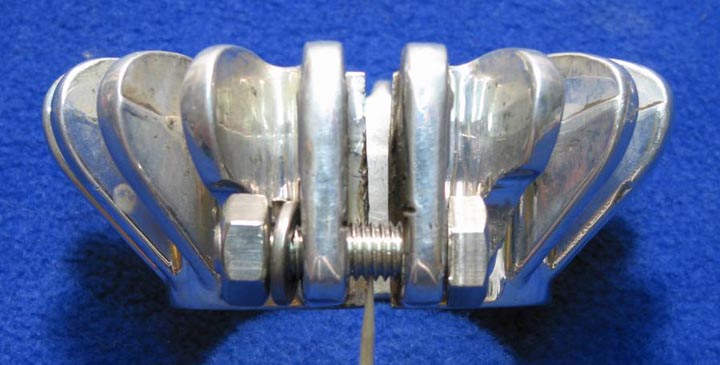
This is the order of the rings. Stripped BMW motorcycle exhaust threadsIt is possible to remove the head and send it in to a number of shops that are set up to repair the threads. Some weld it up and machine the threads down. Some cut off the old threads flush and bore out the hole and insert a pre-made piece and weld it in. Both seem to work well. The same shop will replace any missing fins for a small sum. At the same time you will want to do a valve job. Soon you will have hundreds of dollars in that head. All because you were too cheap to cut the nut off in the first place. I highly suggest that anyone that does some of their own mechanical work be prepared for this work. Buy a good BMW motorcycle exhaust nut tool and at least one spare nut. They are very cheap. Do you have a popping sound at the exhaust?Make sure that you have good sealing at the nuts. Use a plastic tube as a "snoop" device to hear it. Any plastic hose a couple of feet long will do well. Put one end up to your "good ear" and move the other end around the exhaust nut at idle. You will find any leak. Sometimes a popping that can't be tuned out can be fixed with a new exhaust system. After market finned nutA few after market suppliers have offered a clamp-on type finned exhaust nut. It appealed to the owner who wanted his/her R50/R60 to have one of the hallmark features of the sport models. I guess one could say that it could help cooling slightly, but from a person dealing with these bikes when they were new, the real reason was vanity. These were featured in the Butler and Smith catalogs and also sold by Flanders. I saw the exact same ones at BMW dealers in Germany, so I conclude that they were probably made there and imported into the USA.
I asked for photos and Frank Beck was nice enough to send these.
|
|
This page was last edited:
08/16/2007 - copyright
Duane Ausherman |