
Proper torque on the BMW motorcycle
Plus, tips on removing those stripped-out fasteners.
The main reason for a spec on tightness is to prevent over-tightening, not under-tightening. In the case of multiple fasteners on one part, it is also to prevent warping.
Carefully check the torque on the part you are tightening or loosening. One of the BMW shop manuals had incorrect torque settings in it. Some of the aftermarket books have not always gotten it correct. Use common sense and double-check it.
Aluminum is especially sensitive as it has some unique characteristics. I am not an expert in metallurgy, but I have learned a few things. For example, a bent BMW hand lever can be straightened with gentle slow pressure in a warm room. This ability is due to a characteristic called “cold flow.” The Japanese hand levers usually break when straightened. In cases where they do get straightened, they often break later. The BMW levers by Magura are the best. I straightened them when they were bent double.
A significant aluminum problem for BMW was the heads on the /2 starting in the early to the mid-60s.
The valve cover center stud is subject to over-tightening too. It should only be tight enough that it doesn’t fall off, just beyond finger tight. Over-tightening pulls the stud out of the head, and that means that you may need to do a rethreading procedure. It is far better to lose the nut and washer than stripe out the head. Then you will lose the nut, washer, and stud. You may need to use a Heli-coil or other thread repair procedure. In most cases, slightly loose is better than too tight.
Axle nuts should be the necessary amount, which is seldom the amount in the book. Read my page on wheel bearings.
I find it shocking when I consider the amount of money I earned because of incorrect tightness. We fixed problems caused by over and under tightness. Expenses for over-tightness were at least ten times the amount of under-tightness expenses. Safety, due to over-tightening, was also jeopardized by a factor of maybe 5. I didn’t keep accurate records, but it wasn’t even close. Fasteners being over-tight is terrible. See my page on parts that fall off of a BMW.
If you must err, do it on the “under tight” side. Head torque should be 25 ft-lbs. I would rather my BMW be 15 ft lbs than 30 ft lbs.
Repairs caused by incompetence, ignorance, and inattention were many times greater than those caused by poor design, lack of inspection, cheapness, and just plain bad luck.
Learn how to use a torque wrench. The threads must be “clean” and able to be run all of the way down with my finger. I have seen head bolts that were so jammed into the head that it took 15 lbs to turn it against the sides of the hole when it should have fallen out. I had to hammer them out. I would then drill out the excess aluminum. It would have been impossible to torque that head bolt to anything meaningful. Learn to tighten slowly, as opposed to fast.
I prefer to use my beam torque wrench, but I have to check it from time to time to ensure accuracy. The beam type is much better for removing a fastener as it will show where it breaks loose, which is sometimes a useful number. The clicker type is attractive due to the “cool factor,” but in most cases, they are far from ideal. They lose accuracy quickly too.
This torque wrench may not be the best one for use on a BMW:-)
Removing a stripped-out bolt
I learned an old trick from my grandfather as a teenager. When you find a bolt, nut, or screw that seems questionable, take a second to think about this well-proven method.
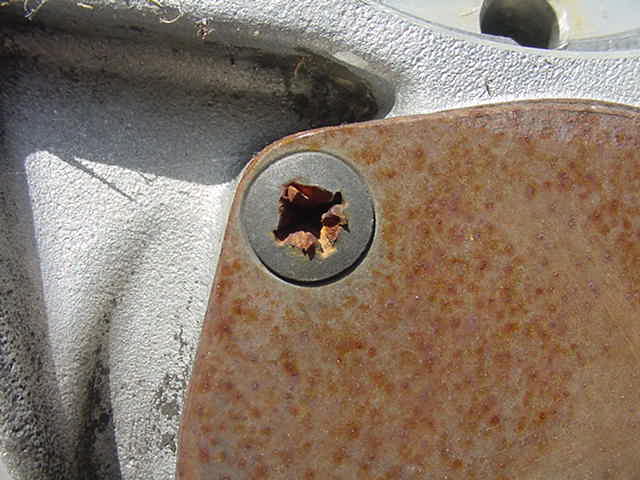
Here is an example of a stripped Phillips head screw on an oil cover of a /6 engine. It looks hopeless, but it probably can be removed quite easily. I would use my hand impact tool. Make sure that you have the correct sized bit. Then dip the tip of the Phillips screwdriver tip into the valve-grinding paste. The paste is made up of ground-up silicate or known as sand. The small particles will take up a bit of space, but they will mostly grab the Phillips tip and the seemingly ruined screw. Hold the impact tool tightly and give it small taps at first to see that the tip seats as well as it possibly can into the screw head. Hold the impact in the direction of unscrewing or counterclockwise for most fasteners. Now hit it.
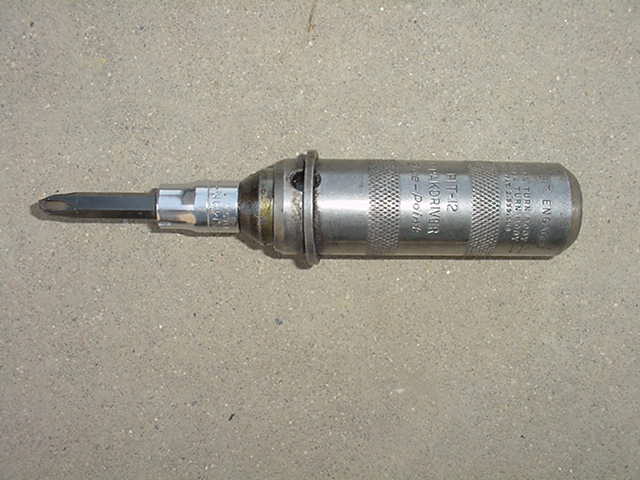
This photo shows the impact tool I have used for over 40 years. This trick with valve grinding paste will also work on slot screws and hex head bolts.
Stephen has the last word on torque.
I was a fastener Procurement Agent with Boeing – yup, I ran the Nut Desk. I sat on a panel in a 7-year study – yup, seven years – which studied the run-on torque and the force needed to break the nut loose from the bolt. One of the large nuts on the six bolts holding the fin on a 767 backed off, which is nick-named a ‘spinner’ by aircraft maintenance folks. Finding spinners during one of the major maintenance checks on planes was more common than desired. Often enough to initiate a study. Most of the major manufacturers and specialty houses participated in the testing.
Yes, lube is important. The majority of fasteners used on aircraft in critical torque installations have a dry lube on them. There has been a lot of research on the type and amount to achieve consistent run-on torque to spec. The installation guns are pre-set for each size/type of fastener – not only for the torque – but the speed the gun turns, which generates heat. Some coatings are metals like silver, zinc, and cadmium (now replaced). There are many bolts/nuts with a cycle limit spec’d – or not reusable.
Here are some things discovered to affect both Run-on Torque and Break-away Torque:
Temperature: of the parts, the gun, the bolts, the nuts, and the room (at the time of installation).
Humidity
The speed of run-on to torque.
The number of prior cycles.
Amount and type of lube – and how applied (sprayed, dipped, chemical, electrical)
Length and size of bolt and nut.
Type of metal or alloy for both bolt and nut.
The pitch of threads for both nut and bolt.
Type of thread: J-thread, cold-rolled thread, hot-rolled thread, cut thread (speed of cutting and metallurgy)
It was found that the same spec bolt or nut made by two different manufacturers had different results.
It was found that if a test jig that measured the torque was vertical or horizontal, it got different results.
There was such a vast amount of test data to be correlated Boeing dedicated one of their Super Cray-2 computers to analyze the variables. It ran for six weeks.
The results were – there were no definitive results. It was determined that so many variables affected the outcome that they could only agree to specified ‘norms’ and create an industry-standard accordingly. The rest was up to God.
A 747 is about 6 million parts flying in close formation, mostly held together by fasteners. You should learn to pray.
Stephen
Updated 30 March 2023