BMW /2 motorcycle Bing carb flanges and sticking slides |
|
This page is about the BMW motorcycle models R51/2, R51/3, R67, R67/2, R67/3, R68, R50, R60, R69, R50/2, R60/2, R50S, R69S, R50/US, R60/US, R69US. Flange intake leakThese models of BMW were supplied with Bing carbs made by Fritz Hintermayer GMBH. Tuning can be compromised due to an intake air leak. The symptom is a "flat spot" as the rpm comes just off idle. It can come from a couple of sources. The most common one is a plugged up idle gas jet and the second is a warped flange. Here is what to do about a warped flange. Virtually all /2 carb flanges will show some warping. It is caused by heat and being tightened at the top and bottom. It is natural. The problem is exacerbated by over tightening of the two flange nuts. I have often found them very tight. The R69S has the split metal collar to help reduce any intake leak caused by warping. It really makes a great difference. The R50/R60, without the collar, leaks a lot more. That is why BMW changed the carb connection on the /5 series. The symptom of leakage past the flange is the same as with a clogged up #35 idle gas jet. The 1968-69 models were provided with the newer carb top that we call a lever top. That carb was also provided with a # 35 idle gas jet. They all have the flat spot unless the jet is changed to a # 40. I have had to change a few to a #45 jet. The /2 BMWs sold in the rest of the world (many years) seemed to have a #30 jet. Change it to a # 35 for proper tuning. The adjustment doesn't make the normal changes in sound and rpm. Running it all of the way in doesn't kill the engine. Each time one laps the flange to "flatten" it out, it is thinner and in the future, warps even faster. I bet I have lapped hundreds of them. Usually the thick paper spacer/gasket must be lapped too. One must be careful to lap evenly or the flange can get thin on one side and "cock" the carb to one side. The flange thickness is the ultimate life of the carb. To reduce the warping we did a few things, but I am sure that today, more is known about what to do for this malady. Someone may offer more current advice on this issue. Only tighten the two nuts as little as possible. We tried silicone to seal a warped flange to avoid lapping. It worked, but now it wasn't "road serviceable" any longer. I bet someone has a silicone gasket that will take a lot of "squish" and seal better. Hand lapping the BMW Bing carb flange
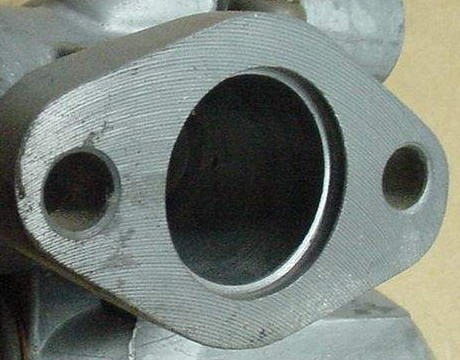
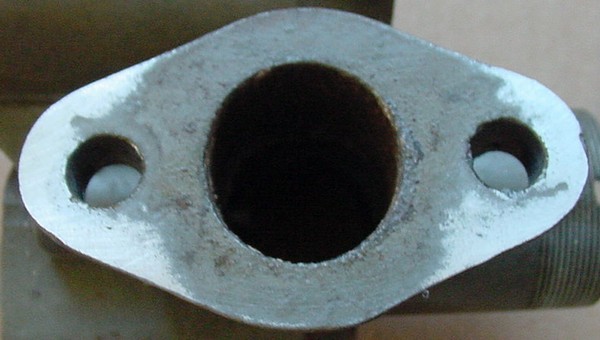
This shows the carb face. If you look very closely you can see some marks in an arc shape. They are the original machining marks from the factory. These are very faint ones, as they are usually far more prominent. It means that we are starting with a "virgin" body, carb body that is. This one still has a long life, if treated properly.
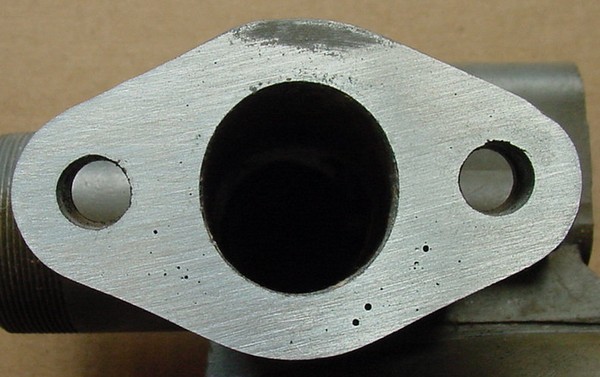
Here is a NOS (new old stock) body for a sport model. See the obvious marks in an arc shape? See the groove machined in the face of the flange? That gets a collar or sleeve. The head has a matching groove. This type seals much better than the non sport type carb.
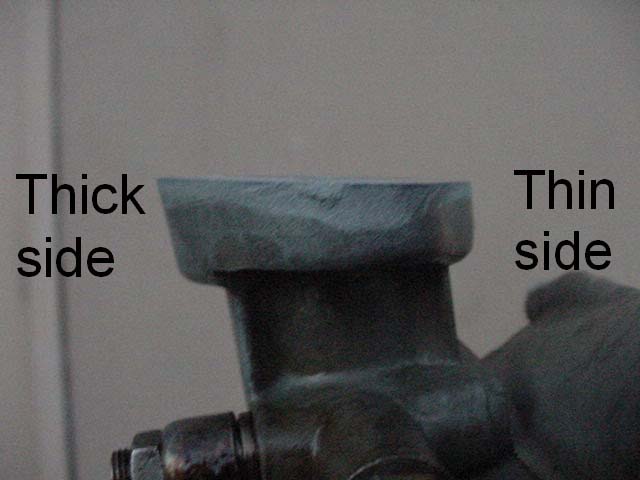
The side view, showing the angle when "new" and not lapped too many times. One side is thicker than the other. It is desirable to keep that approximate angle, but that is impossible by lapping. It is better to lap the thicker side and leave the thinner side as thick as possible.
This is a view of a straight edge placed against the carb face. You can see a large amount of light coming through most of the length of the face. That is the problem that we will fix. An owner can "usually" hand lap the face to be straight and level again without much work. You will need something that you know is flat. I suggest that any BMW owner that does his own work, own a glass plate. It is useful for a few other jobs too. Go to your local glass shop and ask for a 9" X 17" piece of plate glass or mirror. That size serves as a fork tool. Any old scratched scrap is OK for this job. Make sure that they bevel the edges. I have never payed more than $5 for one. They break easily, so get two. Don't ask how I know that. I prefer mirror glass because it serves double duty. Anytime I wonder what my problem is, I just look in the mirror :-)
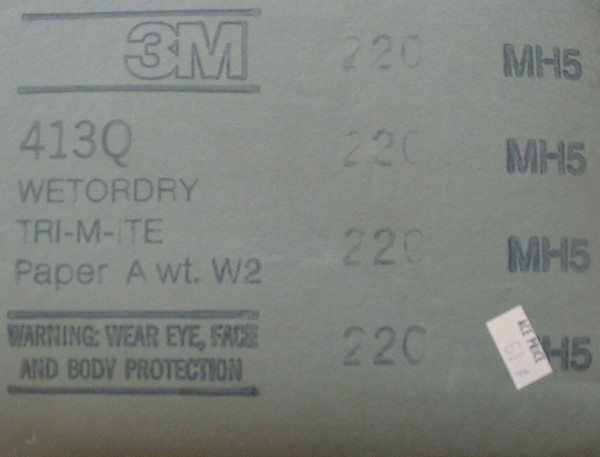
You will need a piece or two of special sand paper. I like the wet-n-dry type. See the price tag of $.19? Maybe I have had this for 25 years, or more. It is made by several manufacturers and they all work well. I like to start with 360 grit to get a look and then change to 220 grit to go faster. Set your glass in a convenient place and add a bit of solvent, then the paper. The solvent will help hold the paper in place. Use plenty of solvent on the paper, as it keeps the fine grit from plugging up the paper quickly. The high spot is at the top and bottom, or tips, of the carb body. At first it will want to rock sideways and is a bit hard to hold.
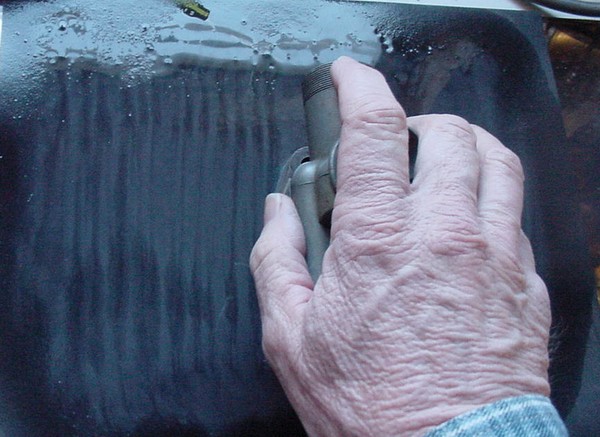
Because the carb body wants to rock sideways, I very carefully lap it up and down, with respect to the photo. You can see the vertical "dirt" tracks on the paper. The starting is the critical part, but it just takes some attention, it's not hard.
This is the result of the first bit of lapping. It is about 15-20% done. Now you can see why it wants to rock back and forth. Don't allow it to do that. Hold it carefully towards the thick side. It is not easy to do.
In this photo the face is about 35-40% done. I would change paper to the 220 grit to save time.
Now it is at about 70% lapped. One could stop at any time and use some filler to finish plugging the air leak path. The less taken off the better for it's ultimate life. Sorry for the poor quality photo.
I have lapped it this far because this body will be shortly offered on ebay. I don't want the potential buyer to be concerned with a non flat flange. We used to always lap them this far, or even totally, because carb bodies were easy to get, and cheap too. Now things are different. Keep as much metal as you can. I would estimate that I took off about .015," or so. It took me only about 6-8 minutes. The top is now .375" thick and the bottom is .395," but I don't know the original size. We worked on so many of these that we never thought about measuring them. We just "knew" how thick they should be. An individual owner won't have any way to judge it, so maybe a measurement will help. New information added 19 April 2005.Although I am not in the motorcycle business, I still like to keep my "hands in." Recently I have had occasion to tune a few /2 bikes. I had to remove and lap the flanges on all of them. No big deal, as I still have some old paper. I had a pair of carbs to do today. I lapped the first one and it went as expected. The second started as expected, but the paper seemed to wear out before I finished. I went into town to get more and decided to get two sheets. They too wore out before finishing the job. I blamed the "off brand" paper, not the lap person. I drove to the next town to get the "good stuff" that I am used to. Here is where I found that I just barged ahead and didn't really examine the carb until I had spent an hour or so with the lapping. I "assumed" once more in my life, again to my detriment. My experience is from 30-40 years ago. The carbs were fairly new and still needed to be lapped. It is only reasonable that 30 years later, things could be worse. They turned out to be far worse.
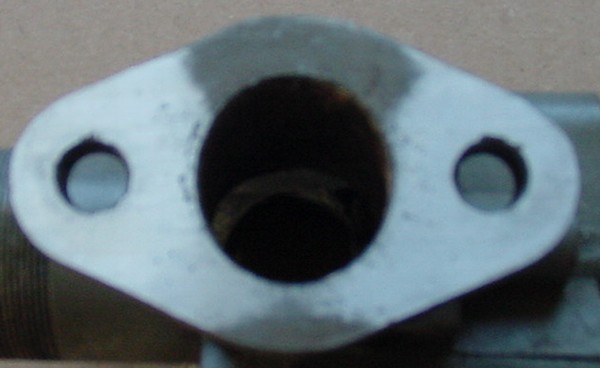
Yes, I know that the photo is of poor quality. I took this one several times and this was the best one. I only want to show how far I got with the lapping before I "woke up" to the seriousness of the warp. This is actually the other carb, but I failed to take think about taking the photos at that time. The idea is to show the upper shaded area that is the part that isn't yet lapped down. The curved lines prove that this carb was never lapped down before.
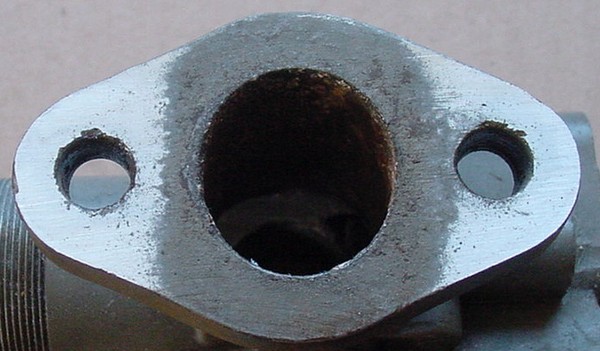
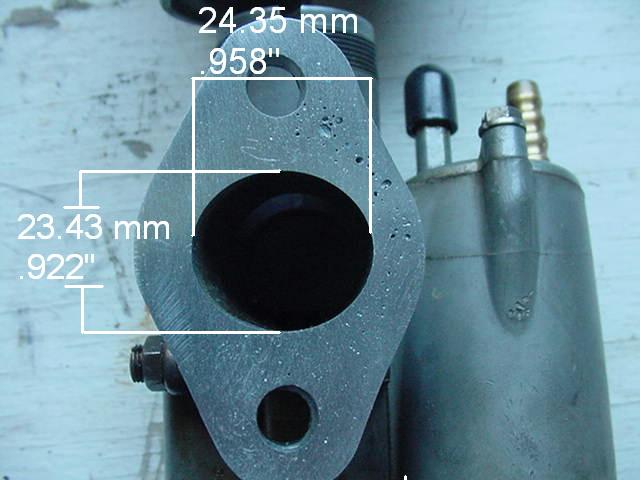
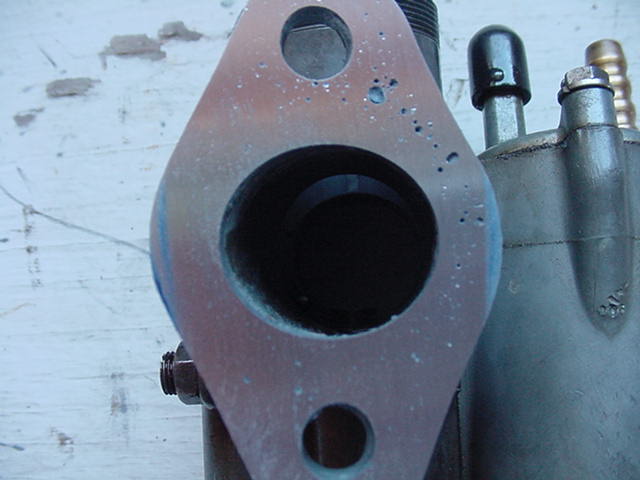
Here is a "straight on" shot. The shot isn't distorted, the throat was distorted by time, heat and stress. I somehow failed to notice this right off, I guess because I had not seen it for a long time. Doing so many of these caused me to become complacent. The carb flange was really warped badly. This explains why my lapping was taking so long. To add to the situation, I had accidentally allowed the carb to "tilt" off to the wrong side. I was lapping the thin side thinner, not the thicker side. The other carb throat showed almost no out of round at all. I presume that they are the same age.
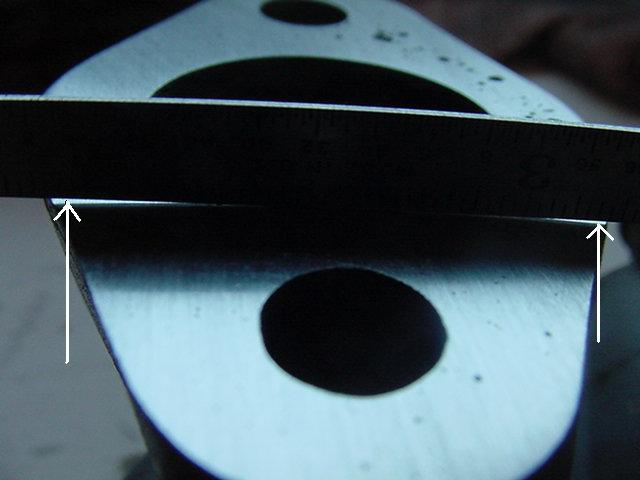
Here you can see what a straight edge revealed. Wow, I wasn't even in the ballpark with my lapping. This shot sort of makes it look like it is curved, but that isn't the case. Most of the lapping was on the thin side. So I now had a fairly wide wrongly lapped area and a fairly narrow untouched one. I had to "feel" for the narrow one and gently lap at it. Every couple of strokes I would stop and "feel" the unwanted wide area and go for the narrow area. I needed a way to easily and accurately show my progress in the right direction. I tried two permanent magic markers, but the solvent washed it away. Then I remembered that the paper is also water proof. I "painted" the flange again and used water.
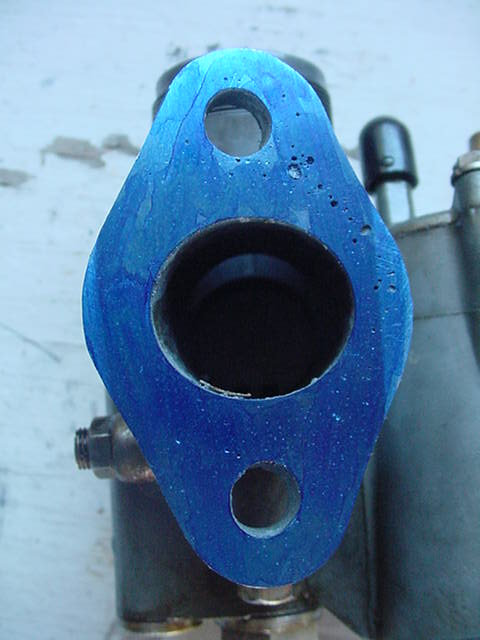
The painted flange. After about 20-30 minutes of lapping I had the desired area larger than the unwanted one.
The blue area on the right is where I first was lapping the flange. Now I have it fairly well lapped down on the thick side.
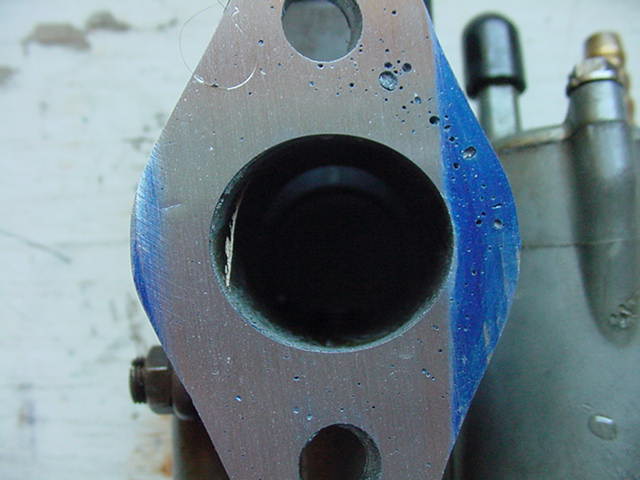
You can still see a bit of blue on each side, but I like to keep the flange as thick as possible. Had I a slight clue that a carb could get so distorted, I would have been far more careful at the start. Will this carb work? It was running poorly and some of it was related to the warped flange and some to the main jet holder that had migrated up in the casting. Did the jet migrate more easily due to the body going through such an extreme warp? I don't know the answer. Will the carb body now stay more stable now that the flange is flat? I don't know. At least I will get it running better than before and time will tell. I think it is time for the owner to start locating a new or used carb. I am very surprised to come across such a warped carb body. I felt it was important to add this info as quickly as possible. Next time you have a carb off, check the throat for being oblong, not round. Check the main jet holder too. Pay close attention to your lapping. R69, R69S and R50S Sport model intake leakageAnother source of intake leakage, on the Sport models, is where the chrome intake tube fits over the carb intake. While this is on the "air side" it still will cause it to run and tune oddly. The internal rubber donut (gasket/seal), likes to absorb some of the fuel and expand. It will expand and cause the chrome intake pipe to slip right off of the carb. It may only force the intake pipe back a little bit, but it may be enough to allow an leak. It won't go back on and if it does, it will slip off again very soon. It is very simple to take care of this issue. We removed the swollen rubber donuts and replaced them. Keep the swollen ones and they will "off gas" and shrink right down to normal. I can't say how long it takes, because we had a box of them and didn't keep track. The "swapping" was a part of our service and we charged nothing extra. If you have a Sport model, buy two extras and rotate them as needed. As I remember our customers would get several thousand miles on a set. Maybe today's fuel ruins them and they can't be reused. Maybe today's donut material is impervious to fuel. Slide sticking?A sticking slide is usually when hot and seldom cold. The rpm just doesn't want to drop down easily, or at all. If it is sticking cold, then it is really bad. Here is how you test it. You can loosen the carb top ring and carefully lift and drop the throttle cable, top and slide, either hot or cold, to see if it is sticking. I would carefully inspect the slide and carb body interior. Find the galling marks where it has been sticking. Usually they are more on the slide than the interior of the carb body. That only means that the evidence is mostly on the slide, not that the slide is the problem. It could be that the carb body is warping and "grabbing" the slide. Check the flatness of the carb flange to see if the carb has been distorted and the body can be permanently warped. That is tough to fix. I very carefully dress them down with wet-n-dry black emery paper and solvent. Too much "dressing down" will allow the slide to wobble in the body and it can be heard at an idle and confused as a valve ticking. A slight adjustment of the idle screw may make the noise change and that confirms the rattling slide syndrome. Rebuilding Bing carbsThese days I read about rebuilding carbs. To me, that means doing a whole lot of work and replacing lots of things. To do so may, in some cases, be justified. We NEVER did a full rebuild. We diagnosed and repaired it as needed. These carbs are very simple and often only one or two things are out of spec. Get the manual from Bing, it is cheap and good. |
|
This page was last edited:
04/07/2006 - copyright
Duane Ausherman |