
BMW motorcycle /5 and later clutch information
Basic BMW motorcycle clutch information
On average, we found that the /5 clutch would last around 60 k miles. Some people rode very hard and would burn one up in short order, and some would get more than 100 k miles. As it wears, it will usually start slipping at high speed. Then the speed at which it slips will gradually lower until you just aren’t going anywhere. It was not uncommon for a person to ride only in the city and have a badly worn clutch without any symptoms. Then one day, the rider would have some reason to get onto the freeway and discover that he/she couldn’t even keep up with traffic due to clutch slippage. Once it starts to slip, it is all over. Assuming that it is adjusted properly, the clutch must be removed for inspection. It could be oil soaked or just worn out.
This is an attempt to clarify some of the clutch issues that have cropped up. It is by memory; fortunately, I still have a bunch of NOS and old clutch parts to show, for an example. I did so many of these that I can’t even remember using measurements, but an individual owner has no way to get that experience. I have included some measurements as examples. Sorry, but I have no metric micrometer or caliper, so I had to use inches.
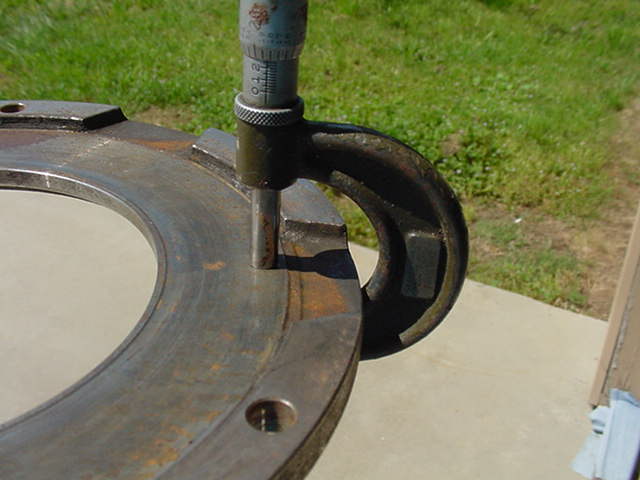
This is the /5 backing plate, and it really can’t easily be measured due to the irregular backside. It is thick overall, and this shows .255″ This plate could be measured by using a depth micrometer and parallel bars of the exact length that fits down into the friction area.
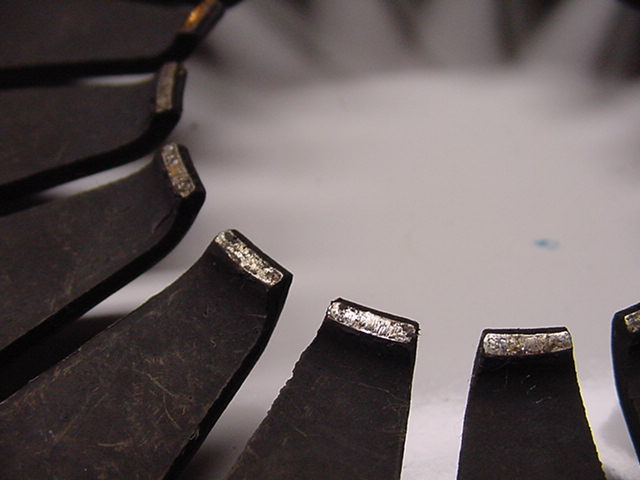
Clutch backing plate for the /5

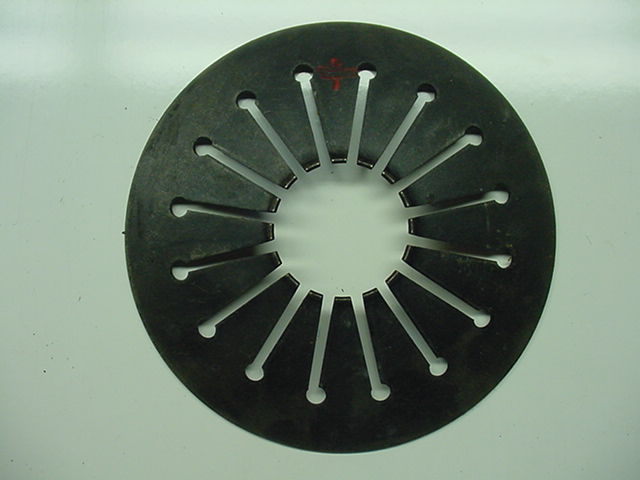
The friction side

Here you can see why it is so strong and resists warping.
BMW motorcycle clutch spring
This is a typical clutch spring used from late 55 up thru the early 80s. See the red spot of paint? See more below.
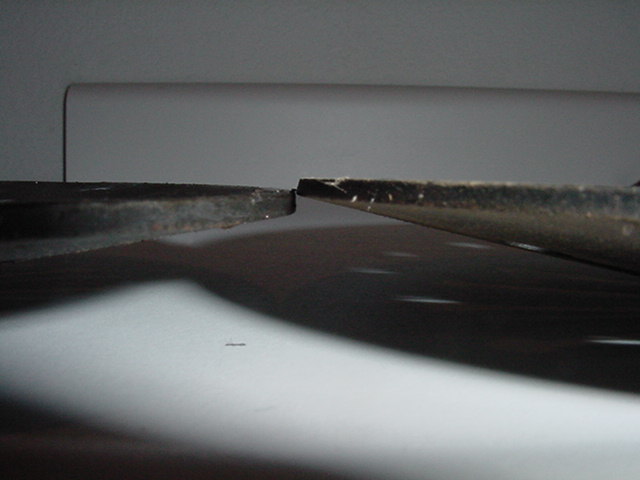
Here are two springs lying on a flat table with the edges against each other. This is to compare for wear. One must rotate them around a bit to get the average. The plane of one side isn’t necessarily parallel to the other side. In the shop, time is your money, and this is a quick way to measure a spring. We always had a new one around for comparison. Neither of these is new, but one is nearly perfect, and the other fairly worn. When the difference in the height of the two springs is the thickness of the spring, then we replaced it. This one is almost to the wear limit. The spec height is 17.7 mm. Just measure down to the surface of the table in a few places, and see if it is still in spec. It should take 165 kg to press it down to 11 mm in height. We never did that.
As a general rule, we found that with normal riding, one could reuse a spring once and sometimes twice with each clutch friction plate replacement. The wear on a spring is in two places. Most of the wear is on the ends of the fingertips. Some wear is on the backside, but not much. A new spring just being compressed for years will flatten out, and it will be ruined.
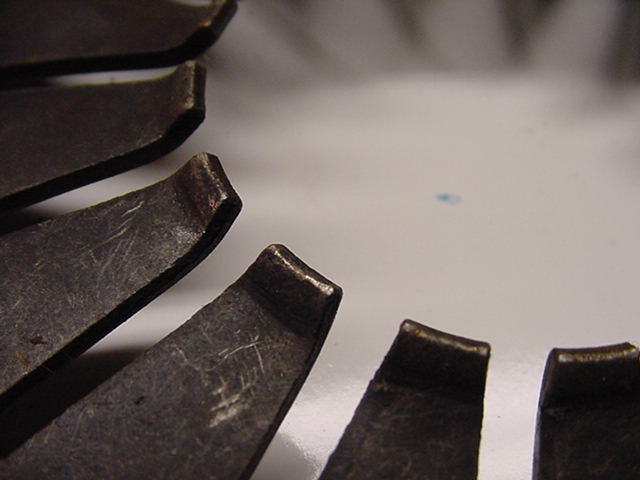
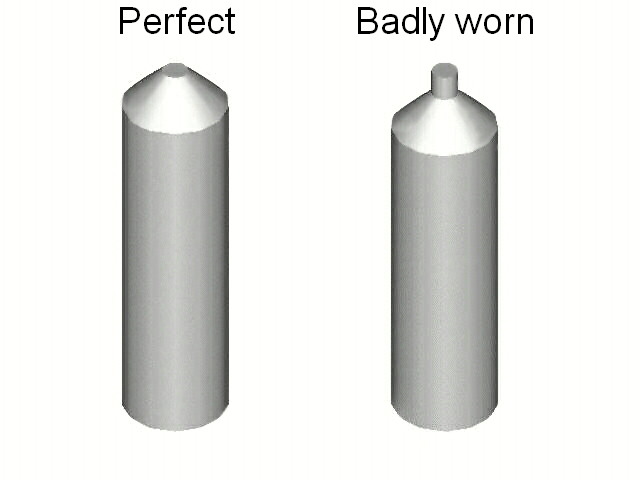
These tips are nearly perfect.
These tips are badly worn, and replacement should be considered. Measure it.
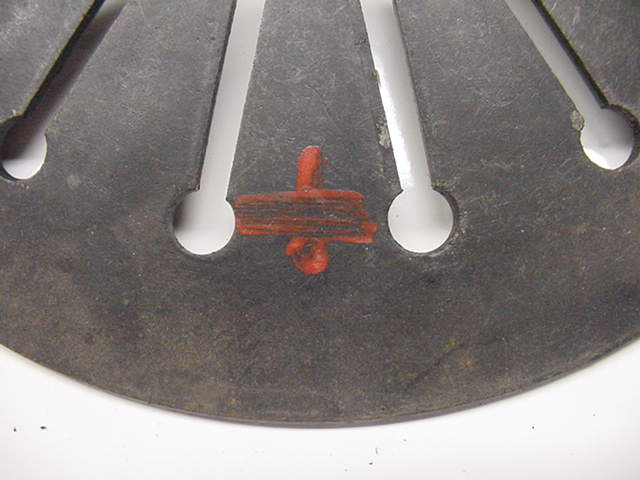
In the first spring picture, one can see some red paint that is a +. Here is a close-up. This mark shows that it is the heavy-duty spring.
/5 clutch push rod
The purpose of the clutch pushrod is to apply pressure to the diaphragm plate. This disengages the clutch for shifting. The rod must be long enough to do the job. As the rod and all other clutch parts wear out, the play must be taken up with the adjustment.
![]()
On top is the BMW clutch rod. The BMW rod has the felt seal near the rear end. The felt seal is to stop oil from traveling along the rod and getting onto the clutch plate. That would cause it to slip. The /5 clutch friction plate can easily be washed off and reused later. Oil doesn’t saturate it. The clutch rod can be easily inserted from the front of the transmission. Never overfill the transmission with oil. Best to only fill to the lowest thread, or even a bit lower. Lower is better than higher.
The lower one is the 3 piece Flanders /2 clutch rod. It has nothing to do with the /5 and later, but I can’t delete the lower rod from the photo.
This wonderful 3D sketch was created by Chris; thanks so much.
I have seen the tit be about one mm long. That means that the effective length of the rod is that much shorter. The corresponding hole in the diaphragm plate must also be inspected for excessive wear. That hole can get wallowed out. That also makes things “shorter,” like the worn pushrod. I have no pictures of a worn one, sorry.
BMW motorcycle flywheel bolts
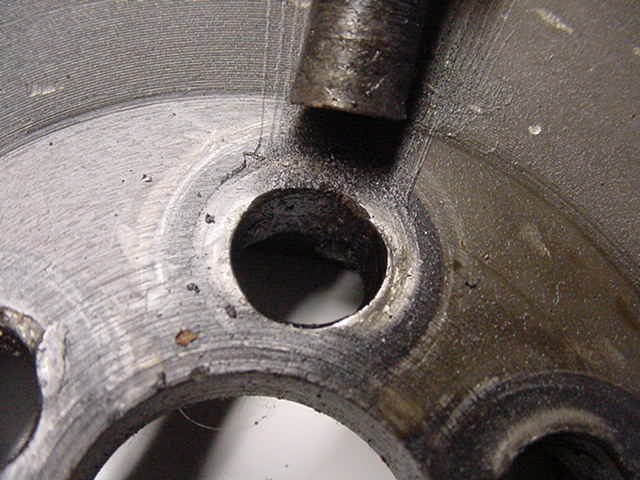
The photo shows a sheared off flywheel bolt on a 1974 R90/6. The rider was riding along in traffic, and the bike revved up all at once and wouldn’t go. Inspection showed that the 6 flywheel bolts had backed out and finally broke off just between the flywheel and the crankshaft. Had this been opened up before the failure, the bolts would have been found to be quite loose. The holes are wallowed out a bit, and that is proof that it was loose for some time before shearing off. The flywheel is usable, but since they are so cheap, I would prefer to find a good used one. The more serious damage is to the crankshaft. Those holes are even more wallowed out.
Why did this happen? We can’t know for sure, but I suspect that they weren’t properly torqued down. Had properly tightened, but defective bolts sheared off, the holes wouldn’t be wallowed out. We preferred to use new bolts each time, as they are cheap when you consider the potential damage. This failure was so expensive to repair that; instead, it is now salvage.
The /5 and later transmissions do not require alignment. The transmission case has a dowel locating pin, so the case can’t move around.
Your BMW motorcycle clutch is “stuck.”
It is not uncommon for one to take a BMW motorcycle out of storage and to discover that the clutch is stuck. The lever will pull in, but the clutch doesn’t disengage. This can happen in less than a year of non-use. It happens more in humid climates. I have removed a few stuck ones and found lots of rust and crud that sort of glues the parts together. One can remove a working clutch and see the rust marks from an earlier “stuck clutch.”
The solution is very simple. Ride the bike. You are thinking, “How do I get it into first gear?” and that is a good question. The same as you would if your clutch cable is broken, and that is on my page about cables and controls. Start the bike up and let it get warm. Point it in a direction where there is nothing to hit. With the engine at a low idle speed, take the bike off of the stand and get ready to ride. Move the bike forwards by foot and gently shift it into first gear. Now you are moving along. Shift up as you naturally would when increasing speed. Within a few shifts, the clutch will break loose. The rust will quickly wear off and get thrown off of the friction plate.
Modification of the clutch for an “easy pull” lever.
The /2 clutch lever pull was always easy. The /5 was a bit heavier, but in 74, the new /6 clutch lever pull was excessive. Several modifications to the clutch pull mechanism have been devised. Google will help you find current mods for the /6 excessive clutch lever pull.
We all know that “There is no free lunch.” So, what is gained and what is lost? The “pull” required after this modification is reduced to about 1/2. That is good. The amount of travel down at the transmission is reduced by 1/2. That is bad. The fact is that the original design has more travel than needed. Losing 1/2 isn’t important, but keeping it in perfect adjustment is more important. The free play at the lever must never exceed the specified amount. At the far end of the lever, it should not move more than 1/4″ (6 mm) before the play is gone. The play will change from the time it is stone cold to really hot. In both cases, it must have some free play, or you risk burning up the clutch.
This article originally covered pre WWII clutches up to the early 80s. Most of the post-war information was about the /2 clutch, as it was problematic. For clarity, I eliminated the pre-war info and split out the /2 info into a separate article. The /5 and later clutches worked quite well and were reliable.
Updated 17 July 2022