BMW Airhead motorcycle shock(s) disassembly and repair
This page is about the BMW motorcycle models R26, R27, R50, R60, R69, R50/2, R60/2, R50S, R69S, R50/US, R60/US, R69US, R50/5, R60/5, R75/5, R50/6, R60/6, R75/6, R90/6, R90S, R60/7, R75/7, R80/7, R100/7, R100S, R100RS. These tests apply to all models to some extent. You may have to improvise a bit. The /5, /6, and /7 rear shocks come apart the same way. Consider Koni Shocks
The quick shock test
You may make a quick test that will show a gross failure of the shocks. Bounce the bike while sitting on it. Does it bounce in the rear, or is it well damped? With the bike on the center stand, grab a shock in the middle under the shock cover and move it sideways. Is it loose or tight? Can you see evidence of oil running down the sides of the shock? Do these tests frequently, and you will learn how it should feel. Then, when you find that it is different, you may want to do some of the maintenance shown below.
Read both the one and two-person disassembly and decide which is best for you. The spring is under some compression. It is necessary to compress it a bit more to take it apart. With understanding and care, it is easy and safe. If you do this all of the time, maybe a real tool is worth it. With 4 full-time mechanics doing only BMW work, we didn’t buy the tool at first. Here is what we did.
One person disassembly of the BMW motorcycle front shock for Earles forks.
If only one person is available to disassemble the shock, here is how to do it. This can be done without damaging the paint.
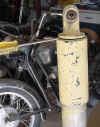
Put the shock bottom in a vise with a cloth to protect the metal. Push the bottom of the upper shock cover to one side to make a small gap at the top. Use a small flat blade screwdriver to get in the gap. I usually use a screwdriver that I have rounded off the sharp edges to keep from scratching the parts. Sometimes I wrapped it in tape. Sorry, but the only shocks I currently have to photograph are these old ugly ones. Don’t despair, as they can be cleaned up to look very good.
Now, lever the cover down to get two larger flat blade screwdrivers in, one on each side. Protect the paint.
Turn them so that they are edgewise and hold the can as far down as possible. The paint is not worth protecting on this shock. You may need to change screwdrivers or use pieces of wood to hold the can down. The idea is to put larger and larger pieces to hold the cover down more and more.
This should give you access to the 2 or 3 round rubber donuts, just under the top piece and on the round shaft. Move the rubber bumpers down to get access to the round shaft. That will expose the two flat places milled on the shaft for a 9 mm open-end wrench. Use the 9 mm open-end wrench on the flats and a round Tommy bar in the hole of the top piece. Wrap tape around the wrench to protect the paint. The wrench will hold the spring compressed, and the tools can be removed.
You may be able to turn the top piece now off, but probably not. Use a propane torch to heat it up. No matter how you compress the spring, you may need to heat the top casting to get it off.
Avoid burning the rubber in the top bushing. Set the temperature to boiling water (read; sizzle spit), which should be enough to turn the top off. Let it cool gradually. With one hand holding the cover down, carefully remove the 9 mm wrench with the other. Remove the cover and spring.
Two person disassembly
Put the shock upright in a vise and tighten it on the bottom (eye) mounting part. Grab the can, or shock cover, with both hands and pull it down against the spring. It must be pulled down about 1,” Have your helper use a screwdriver to slide the rubber donuts down 1/2″ to expose the shaft. Now slip a 9 mm open end wrench onto the two flats that are on the shaft. With the wrench on the flats, the can no longer needs to be held. The wrench will hold the can down and the compressed spring. Put a round tommy bar in the top (eye) mounting hole and unscrew the top. The aluminum top will usually need some heat to free it up.
Testing the Boge hydraulic unit
With the top removed, compress the can, remove the wrench, and carefully release pressure on the spring. Remove the spring. Screw the top back onto the shaft a bit, as this gives you a place to grab. Slowly move the shaft up and down several times. If you feel any “free” places, then it is bad. The pressure required to go one way isn’t the same as the other way. It should go in easily and come out much harder. For this test, it must be vertical, which is the normal operating position.
To remove the /2 hydraulic unit, I use a strap wrench. It won’t crush the unit. A pipe wrench may be used if it is to be replaced anyway. Heat may be needed, but only on the aluminum casting, not the steel hydraulic unit.
Your first one may be a struggle, but all of the rest of them will be easy. The /6’s are much harder to remove due to a change in the top piece. The spring must be compressed much more. It takes two people.
I highly recommend inspecting the holes in the covers where they barely slip over the castings. You need to remove any burrs. Make sure that they slip on and off easily. This will make it easier to assemble.
To reassemble, heat the /2 aluminum parts, or they will unscrew later. The /5 needs some serious torque or use Locktite (glue) as it can unscrew too.
Upon reassembly, inspect the place where the top and bottom covers telescope together. If they aren’t aligned properly, they will rub together and self-destruct. See photo.
See the large gap on the left side and almost nothing on the right side? If they are not equalized, you run a good chance of them rubbing against each other. I have seen them wear entirely through the metal. The same thing applies to the rear shock of the /2.
Occasionally I have been able to rotate the cover and fix the gap error. Usually, this doesn’t work, and it must be shimmed.
This paragraph applies to the photo above. With your thumb on the lower left side, push over towards the right side. In the crack created, up at the top, where you first inserted the small screwdriver, Now insert a shim. I have used a variety of materials but found that old playing cards work well. They don’t compress or decompose with time. Cut as needed to make them invisible. Use the thickness that gives you equal space all of the way around.
The rubber mounting bushings can be easily changed if needed. They are usually good for a long time. The ones shown are in poor condition but will work. If no press is available, use sockets and a vise. Use one socket slightly smaller than the bushing to do the pushing and another socket with an inside diameter that is larger than the OD of the bushing.
I have seen 2 and 3 rubber bumpers. They are the rubber donut pieces on the shaft of the hydraulic unit. They serve as a limit to the compression end of travel of the front end. Some bikes have 2 on one shock and 3 on the other. It could be some kind of progressive stopping thing. I have never had to replace them because they were worn out.
Removing the /2 BMW motorcycle rear shocks
The rear shocks have a polished aluminum cover at the top. The cap is cosmetic and also keeps rain from rusting the rod and nut at the shock top. Sometimes the cap can be hard to remove. The stock toolkit has a spanner wrench (American lingo) that fits into any of the 4 holes and turns the cap.
An original spanner from the tool kit.
This is just a leftover tool and not what I used. This tool also removes the exhaust nut. It has the wrong radius for the rear shock cap. See the two pins in the middle of the curve? They are for adjusting the rear swingarm preload. I would grind that part of the curve deeper to reduce the radius. Then it will fit the cap.
The cap often gets stuck to the hydraulic unit rod. It will just turn and turn. At the first sign of spinning, stop. You will only make it worse. The most common solution is to apply heat to the top of the cap. Heat it in the top center with a propane torch. Use the spanner and hit it sharply with a steel hammer. That should pop it loose. You may have to try more heat, probably well above the boiling temperature of boiling water. Don’t use a rubber or plastic mallet. You want as much of a “shock” as possible.
If heat fails, you may have to damage or destroy the cap. Drill a small hole down into the center. That allows you access to the top of the threads. If the frame is bare, then it is easy to also turn it upside down and soak from the bottom too. Soak it well with your favorite penetrant for a few days. Now try the heat again. If that fails, then drill a hole that is large enough to get a slot screwdriver into. The top of the rod has a screwdriver slot in it. This allows one to hold the rod while tightening the locking nut upon assembly. Use that slot to hold the rod from turning. Always use heat as needed.
In the worst case, you may need to cut the cap off. That is rarely needed. Once off, you can now polish it easily. It will go back on easily and work well. The caps are available new from Mobile Traditions. The hole in the cap can be welded up to save it.
Feedback from Eric, I haven’t tried it, but it sounds great.
I might share a recent episode with the group in case it might help a few here or there. I bought some shock covers to put on my coverless shocks and started the project last night. I read Duane’s article on one-person and two-person disassembly and thought I’d have a go on the one-person version. Not being a big fan of torches (call me a wuss), I went to one of the guys out in the shop (I sell garbage trucks, and we have a six-bay garage here to service them) to see how we could take a little bitty 9mm wrench and get the top off the shock off. He said, “heat it.” After explaining my wussiness, he then handed me a 2 1/2 foot skinny steel pipe. “Leverage,” he said. In the absence of a spring compressor, he also handed me a couple of nylon ties to feed through the spring and tighten them up a bit. It worked like a charm. I stuck the head of the shock in the vise and went to work. The ties pulled the springs down about an inch and a half, and I stuck the pipe over the 9mm wrench, and…..viola!!!…… the rod was loose in no time. This was by far the quickest job I’ve done on a motorcycle.
Updated 15 July 2022


