
Change to tapered roller bearings on your Earles Fork BMW motorcycle
Proper adjustment of the steering bearings.
This page is about the BMW motorcycle models R26, R27, R50, R60, R69, R50/2, R60/2, R50S, and R69S. Earles forks, often called leading link suspension, were introduced on BMWs in 1955. They were specifically designed for use on a bike with a sidecar. They are known for providing a soft ride and being extremely robust.
BMW used ball bearings on the Earles forks; while they worked, they easily became notched with small detents in the straight-ahead position. In 1970 BMW changed to tapered roller bearings, and they provided a longer life. Neither setup is ideal for this application, but sort of works out OK. The problem is that the forks don’t make full revolutions. They go back and forth over a small range. This means that the pounding that they get from the road is mostly in one spot.
The test for “notched bearings” can be done in several ways. One of the first symptoms a rider notices is the inability to place the front tire exactly where the rider wants. If a quarter were placed on the road, the rider couldn’t run over it. The notch in the bearings would cause the bike to always ride in a minor continuous curve. Another symptom is to look at a track made by a bike on wet pavement at 25-30 mph. If the track is a big S curve and not straight, then the bearings are probably notched. Put the bike on the center stand. Very gently swing the handlebars back and forth through the straight-ahead position. A notch can be easily felt. In really bad cases, the forks can be moved off-center slightly, and they will return on their own to the center.
Since you must remove the entire front end to replace them, why not use better bearings? The later style tapered bearings can be installed. Do not go out and buy /5 tapered bearings for the steering. They are quite close, but not the same. I don’t know the relative cost, but compared to the labor, it isn’t significant. A properly lubricated and adjusted set of tapered bearings will last several times longer than the original ball bearings. I understand that they can be purchased from Vech.
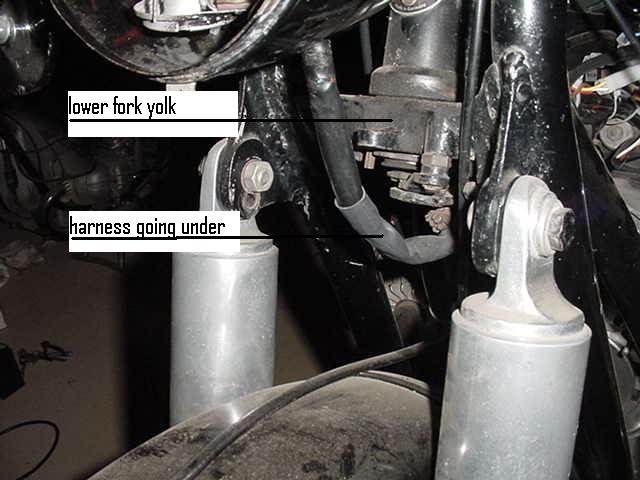
If you are at all mechanical, this is an easy job. In most cases, BMW usually routed the wiring harness over the top casting part of the Earles forks. That causes the harness to rub and wear through the outer sheath quickly. I preferred to route it under that casting and get more years out of it. If it is under, then one must unwire the harness in the headlight before dropping the forks. Make a drawing with colors of the wires and the terminal post numbers etc. Aside from the wiring, an experienced mechanic can do the whole job in less than two hours.
This is a harness after “surgery” to repair the damaged area. The harness was fairly new, as it was supple and of the replacement type, not the original style. We unwired the harness from the headlight, cut out the worn places, and repaired a few other “altered” places. This only took about two hours and was faster, easier, and much cheaper than replacing the whole thing.
If you are using this page to start some other fork work and are going to try to reuse the steering bearings, put a clean surface down so that you can find the 54 balls after they fall all over the floor. No matter what type of bearing you are installing for the steering, they should be over-tightened a bit, and then the adjustment backed off to normal. This will help to fully “seat” the bearings.
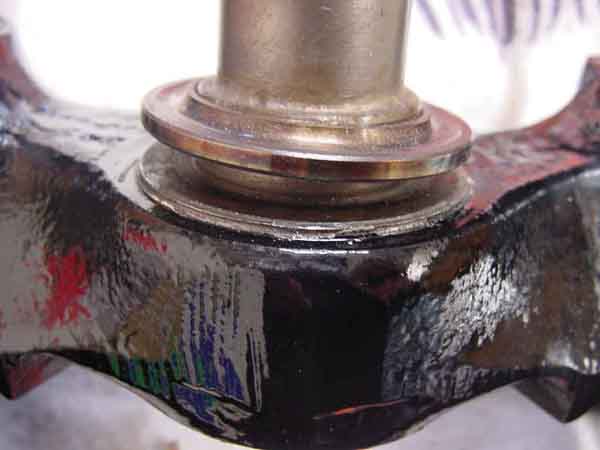
This is what the old race looks like when slightly lifted off the casting. This is the lower set of races.
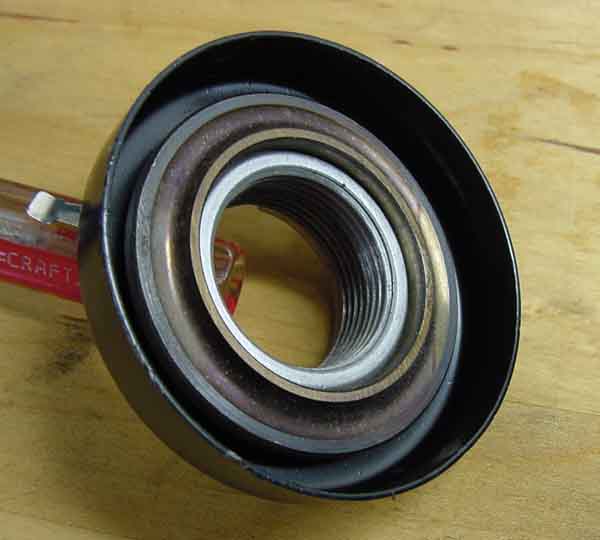
This is what the top race of the upper set looks like in its dust cover.
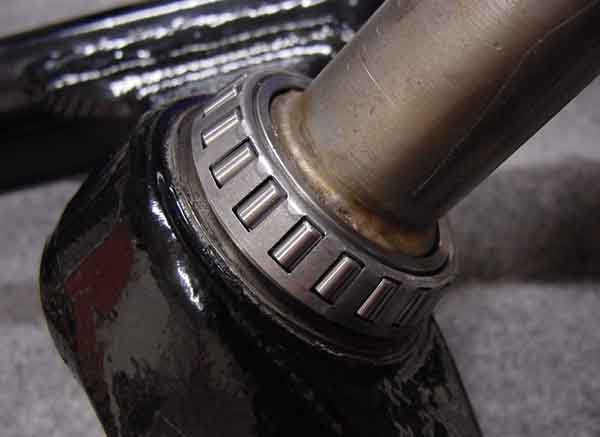
This is what it looks like after you have installed the tapered bearing to the casting.
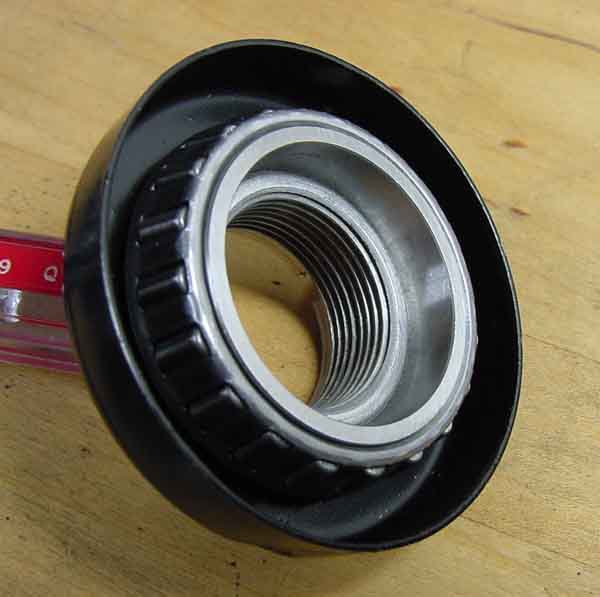
This is the tapered bearing mounted inside of the dust cover.
/2 BMW motorcycle steering bearing adjustment
This adjustment sequence is the same for the original ball bearings or the tapered roller bearing modification. This procedure doesn’t apply to the telescopic forks but click here for what we call the “US” models. The original BMW motorcycle toolkit comes with a thin flat combination end wrench to loosen and tighten the lock nut and adjust the steering bearing.
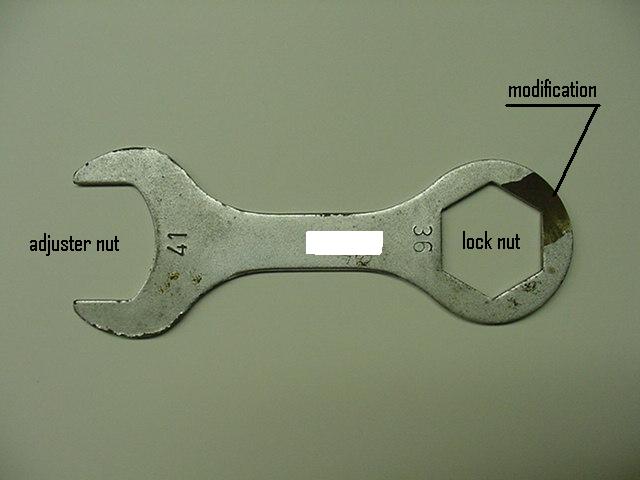
This wrench has been modified to also work on the US models without removing the handlebars to make adjustments to the steering bearings.
Make sure that you have the washer mounted under the top plate. Sometimes a previous owner has lost the washer and may not be aware of its existence. Without the washer in place, the top plate will be warped downwards and eventually take a permanent set.
I wrote this to show how to make the adjustment. Making the adjustment assumes that all is in order, but at this late date, that could be wrong. Thanks to Vech and another person, I have decided to start over. Some is a direct quote from Vech.
When you are doing any work on your Earles fork bike steering system, I suggest taking a good look at it. Many things could be amiss at this late date, and you might not realize it. This aspect of this issue might well bring more questions, and that is OK.
Check your top plate for being flat, if not, fix it. A press works well for this fix because that plate is thick and requires some serious pressure. Do you have the washer under it? You may have no washer or the wrong one. They are provided in 4 thicknesses, and Vech stocks them.
31 41 1 231 201—-steering head shim 1.5mm twins & singles 1955-1969
31 41 1 231 202—-steering head shim 2.0mm twins & singles 1955-1969
31 41 1 231 203—-steering head shim 2.5mm twins & singles 1955-1969
31 41 1 231 204—-steering head shim 3.0 mm twins & singles 1955-1969
- Tighten the lower steering stem nut TOO TIGHT initially to ensure the upper and lower bearing races are seated in the frame.
- Back the lower steering stem nut until one has a light drag on the front end.
- Temporarily Install the upper plate without the shim washer and upper steering stem nut. Mount the plate with the two bolts to hold it in place while you try to shove a washer, or shims, into the gap. With the upper plate seated, take the existing washer, if you have it, and stick the edge between the upper plate and the lower steering stem nut. See if the shim washer is too thick, too thin, or just about right. If it is the proper thickness, remove the upper plate and install it. If it is not the proper thickness, measure the thickness, and referring to the above part numbers, order the correct one. The gap can easily be measured with feeler gauges. Once you have a washer of the correct thickness, put a slight amount of grease on each side. This allows the lower steering stem nut to move easily for proper adjustment.
I will give the (incorrect, in my opinion) factory procedure for adjustment. It is to loosen the lock nut. It is on top of the thick plate that I will call the plate. Then use the wrench open end to get in under the plate to turn the adjustment nut. This is best done by two people. One is gently pulling on the forks to feel the play. The second is adjusting the nut at the same time. When you are happy with the adjustment, tighten the lock nut that is on top of the plate.
Sorry, but this doesn’t work, and here is why. If you had the forks off of the bike and only the lower steering stem nut screwed (adjuster) down on the threads of the steering stem, you would find that the adjuster has a bit of up and downplay. These are fine threads and good quality, but still, there is a bit of play.
During your adjusting, the pressure from the bearings has the adjuster in the “up” part of the play. When the lock nut is tightened, the adjuster is forced into the “down” part of the play. While this amount of movement is very small, it increases the tightness of the steering bearings. They will wear out faster, and the evidence will be a “notch,” as mentioned above.
Here is the solution that was used in my shop. Get the adjustment close. Tighten the lock nut down most of the way toward the final result. This puts pressure on the adjuster to move it into the down part of the play. Insert the wrench to do the adjusting as your helper gently pulls and releases the fork. You may need to tap on the wrench to move the adjuster. You may need to make several attempts of slightly too loose or too tight. After several times of going back and forth, you should get the feel of the right position. This feel is quite subtle to some people and obvious to others. You must judge yourself before doing this task. Now add a bit of torque to the lock nut. You are done.
Warning
Use grease liberally on the bearings. Never let a car wash pressure wand get near these bearings, the wheel bearings, or the swing arm bearings. The hot soapy water, under pressure, will wash the grease out and ruin the bearings. Water is the most common cause of wheel and swingarm bearings to fail. Steering bearings fail from both water or improper adjustment. It is common for the steering bearings to loosen up after a few hundred miles. We always asked the customer to bring the bike back in 500 miles for a free check and adjustment.
Photos generously provided by Dale Thomas, thanks.
Updated 15 July 2022