
BMW motorcycle wheel bearings, 1956 through 1969
For /5 wheel bearing information, go to https://w6rec.com/the-5-wheel-bearings
This page is about how front and rear wheel bearings work in the BMW motorcycle models R26, R27, R50, R60, R69, R50/2, R60/2, R50S, R69S, R50/US, R60/US, and R69US.
This article calls the entire production of all models, twins, and singles, from 1956 through 1969, the /2.
This article has been edited more than 50 times in an effort to answer questions by readers. You, the readers, have built a lot of this website.
Bearing basics for BMW motorcycle wheels
The post-war (mid-1955 on) BMW was designed to withstand the forces of a sidecar, the same as a car. To properly support a car or truck wheel, the bearings must withstand great side loads, which is what happens when one goes around a corner. Unlike a car, a solo motorcycle only needs to support forces through the vertical axis of the motorcycle. A BMW, in solo operation, has at least 1000 times the capability that it needs. The system costs a bit more and requires some special maintenance. The system can easily outlast any other moving part on the motorcycle. BMW has the best wheel bearing system of any motorcycle. See the engineering calculations at the bottom of this page.
The wheel hub has a bearing on each side to hold it up and allow it to rotate. These bearings are tapered and have rollers, not balls. The two tapered bearings are opposed to each other. That means the tapered parts are angled or pointed in towards each other. Tapered bearings need some small preload or pressure to obtain maximum life. Cars have an externally adjustable nut to set them. Our motorcycles don’t have this feature. The BMW design is to have it properly spaced when new, and it may never need to be changed. That design idea is a good one, but BMW screwed it up during assembly, and the motorcycles arrived at the dealer in such a way that they commonly failed.
I can’t recall ever seeing a BMW wheel bearing fail from wearing out. The most common failure of the bearings is caused by foreign material contaminating the lubricant. It is usually water, or soap, from high-pressure coin car washes. One can reduce the chance of failures by keeping the direct spray of hot soapy water off of bearings in the wheels, steering, and swing arms.
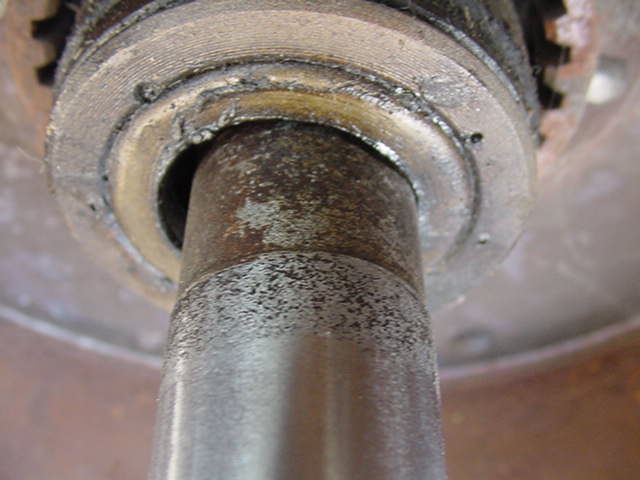
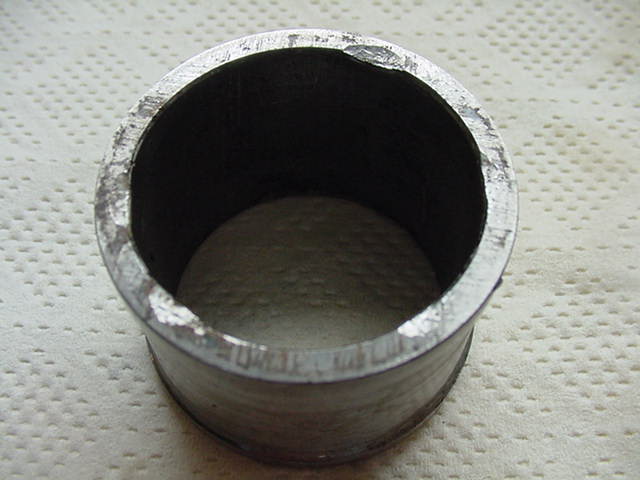
![]()
This photo shows rusty bearings that can be the result of high-pressure washers.
The real issue of wheel bearing preload
If you read the Timken numbers found at the end, you will find that we use some very good bearings. The calculated life is 2.6 billion miles for the lighter /5 bearings and far longer for the heavier /2 wheel bearings. The Timken website has a curve showing the preload vs. the bearing life.
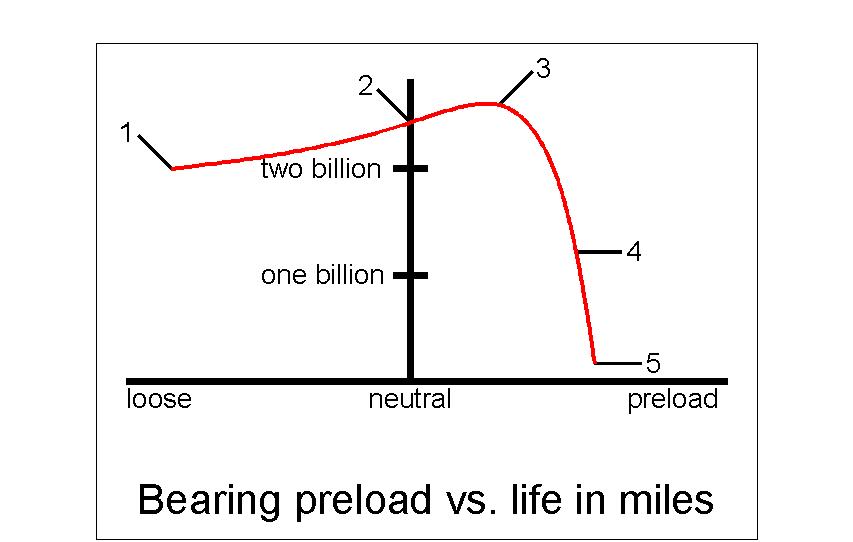
Thanks to Chris for sending me this much-improved graph. I think he took pity on my inferior hand-drawn one. The horizontal line shows the left end with some looseness and the right end with preload. The vertical line is neutral preload, no play, and no looseness. Going up the vertical line is the miles or life of the bearings. Anything on the left side is going to have a loose wheel, and we know that will give poor handling.
The numbers in the drawing are described below.
1. With this bearing set up, the wheel would be loose, and the bike would handle poorly; however, the bearings would still last 2 billion miles.
2. The wheel would be held solidly and not be the source of any poor handling. The bearings would last slightly longer.
3. The point of maximum bearing life, with some preload, shows that they are good for 2.6 billion miles.
4. Halfway down the failure curve, but still lasting a billion miles.
5. WAY down the curve of bearing life, but still probably 100 million miles. Just how far do you plan to ride it?
All of this is to show that one has to mess up to make the bearings fail. The adjustment is nearly unrelated to wheel-bearing life. Keep the bearings clean by lubing often, and they will last. So what is the big deal? Why is so much fuss made about this issue?
Mechanical details
The /2 BMW Earles fork motorcycle front and rear wheels are interchangeable, from the introduction in late 55 to the end of production in 1969. In 1968 BMW came out with telescopic forks on some models. They were designated by the suffix US. A 1968-69 BMW with telescopic forks was called R50US, R60US, or R69US.
A list of variations
- Rims could be alloy or steel.
- Alloy rims could be a low lip or high lip.
- There were two spoke patterns with two spoke sizes.
- Solo and sidecar rims were a different width.
- Two types of seals were used.
The wheel bearing stack was identical from front to rear wheel in any given year. A sidecar rig had 4 wheels. With three wheels on the ground and a spare on the “trunk” of the hack, all wheels could be used in any position. They were totally interchangeable. They are # 30204 and can be purchased at any bearing house. All /2 twins use this bearing. The single-cylinder bikes use a 30203, which is smaller. That smaller bearing is also used on the /5.
The combination of the two bearings and spacers is called a “stack.” It must be removed as a unit. The spacing system for the wheel bearings is internal and part of the stack. This spacer system is in two parts. The inner spacer is first in two parts and holds the (cones inner race with rollers) apart. The second, the outer spacer, is one part and holds the cups (outer race) apart.
Changing the length of either will change the spacing or what we call the bearing preload. BMW provides for this spacing or preload adjustment by changing the inner spacer’s length. The smaller of the two inner spacer parts comes in many sizes, and it resembles a wedding band, so it is called that. These “wedding bands” are made in small increments, so it would seem that a box full is needed to adjust the spacing. It’s not as hopeless as it might seem. The /2 wedding bands are in increments of .1 mm, which equals .004 of an inch.
Checking the spacing of the /2
The BMW method requires the removal of the stack to check or change the spacing. The BMW procedure is not only time consuming but allows for an inaccurate result. Do not use this method.
Warning, use only the very short 22 mm wrench from the toolkit or a torque wrench. Using the short wrench makes it very hard to over-tighten the axle nut. It is better to have the axle nut under tight than over tight. All that you care about is that the nut doesn’t fall off.
I have a very easy test that you can perform to determine if the spacing is in the ballpark or not. I call it the “shake the wheel” test. This test is no secret, as it is the procedure for car wheel bearings. I just borrowed it for use on our motorcycles. This procedure takes two persons. Have your helper, on the right side, with the 22 mm wrench at the axle nut. Leave the swingarm pinch bolt tight.

“Tightener”
My helper is taking the picture, so I must do both for purposes of demonstration. I am in a position to adjust the axle nut for testing.
“Shaker”
Now I am on the left side with the wheel in one hand and the frame in the other hand. Try to feel side play, and you should feel no play with the axle nut tight. Have your assistant loosen the axle nut a turn or two while you feel for play. Once the “shaker” feels the play, the “tightener” slowly tightens the axle. The shaker can feel the play go away as the tightener slowly tightens up the axle nut. The shaker orders “more” until the play is gone. Do the test again for accuracy until the “tightener” has a feel for where the wrench ends up. Now loosen the axle nut with a beam-type torque wrench to see how tight the axle nut was. BMW recommended the axle nut be tightened to 25 ft pounds. If it happens under 10-15 lbs, then the preload is too tight when the nut is at 25 lbs. If it happens over 25 feet, the preload is too loose. Too loose is better than too tight.
That is just a standard so that everyone will tighten the axle nut to the same torque. BMW could have picked another number, and it wouldn’t matter as long as we all use it.
The /2 BMW motorcycle wheels
The front and rear wheels are exactly the same on the Earles fork twins and the singles. The axles are of different diameters, so a bushing is used to take the smaller diameter of the front axle. The twins have 40 spokes, and the singles have 36. The wheels are interchangeable between the front and rear. In 68 and 69, BMW produced a model we usually call the US model. It has telescopic forks and has different front and rear rims. Those wheels are interchangeable, but you wouldn’t want the fat tire in front and the skinny one in the rear. The wheel bearing system is the same as the others.
The bearings are the same for any model’s front and rear wheel. The /2 twin uses the 30204 and the single, a smaller bearing, the 30203. The only real difference is that the front axle is smaller in diameter than the rear. A spacer called “bushing” is inserted into the front wheel hub to allow for the smaller axle.
The wedding bands are in increments of .1 mm, or .004.” Lacking the spacers in spacing one stack isn’t a big deal to get it perfect. If you are doing this on several wheels, consider the time savings and accuracy of using the shims.
The aftermarket shims (see the source at the bottom of this article) are in smaller increments, and that allows you to get more accuracy.
The hubs are steel, so the bearings and hub’s expansion from heat is identical. The amount of interference fit can be much less. This virtually eliminates the chance of spinning the bearings in the hub. I have only seen one or two /2 hubs fail from spinning bearings.
Before 1965 the seals were made of felt and were not very effective. In 65, BMW changed to a modern knife edge seal made of Neoprene, and they worked much better.
The /2 bearing stack removal and spacing
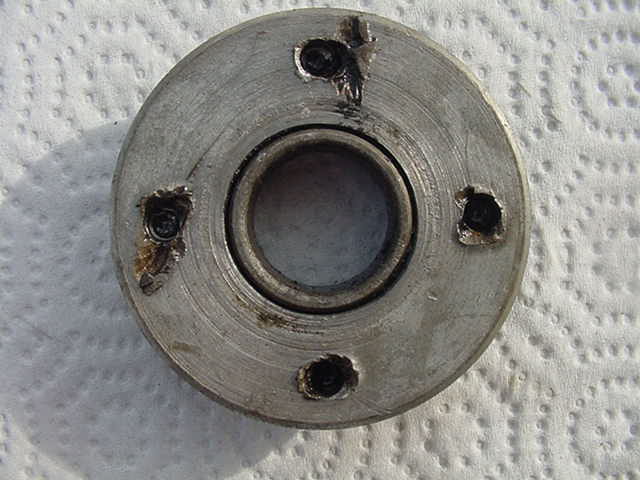
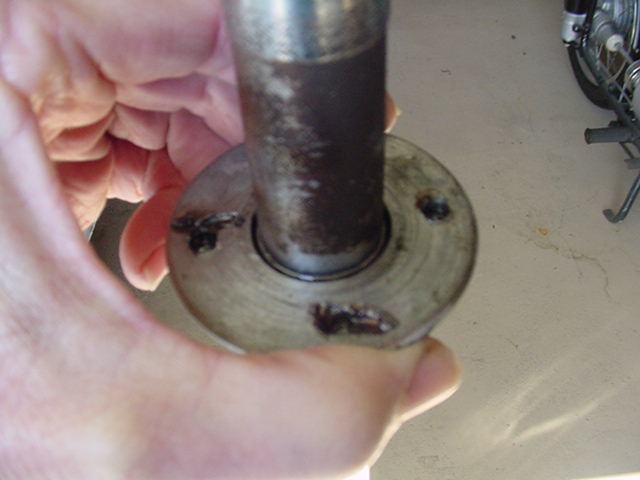
The /2 has a seal holder, often called a /2 hub nut, It has 4 holes for removal, and that requires a special tool. Buy or make the tool. Never use a hammer and punch to remove the BMW /2 hub nut.
It is very important to mention that this seal holder does not need to be tight. Tightness only makes trouble. I only put it on about hand tight. That means hand tight using the tool below, but not with a breaker bar in it, just by hand. This hubcap (dust cover) has nothing to do with the pre-load on the bearings.
Directly under the hubcap is a wavy washer that keeps tension on the hubcap so that it doesn’t vibrate. The seal holder and seal are only needed to keep foreign material out. The bearings don’t need either of them or the wavy washer and hubcap for spacing purposes.
Below is a list of 19 steps to follow.
1. Remove the wheel.
2. Remove the seal holder (bearing retainer) and hubcap. If this is a front wheel, you must first remove the reducing bushing. It should come out easily; use the front axle, and insert it from the right side and bump it out with a rubber hammer. It may be stuck if the bushing hasn’t been removed for many years. I would use some penetrating oil and leave it overnight to soak. You may need to use a metal hammer to remove it. Clean it up so that it goes in smoothly and comes out easily. Do this now, before you proceed, or you may get into trouble.
Removing the seal holder can be a problem. I will go into some detail about removing the seal holder and felt seals. My examples are of the older type seal holder used up to 1965. The 1965 and later have a far better seal system.
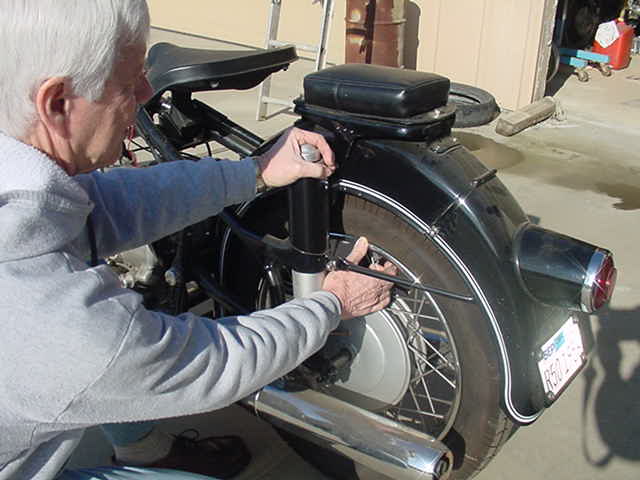
Thanks to John Watts, owner of a 1959 R69, for the photo.
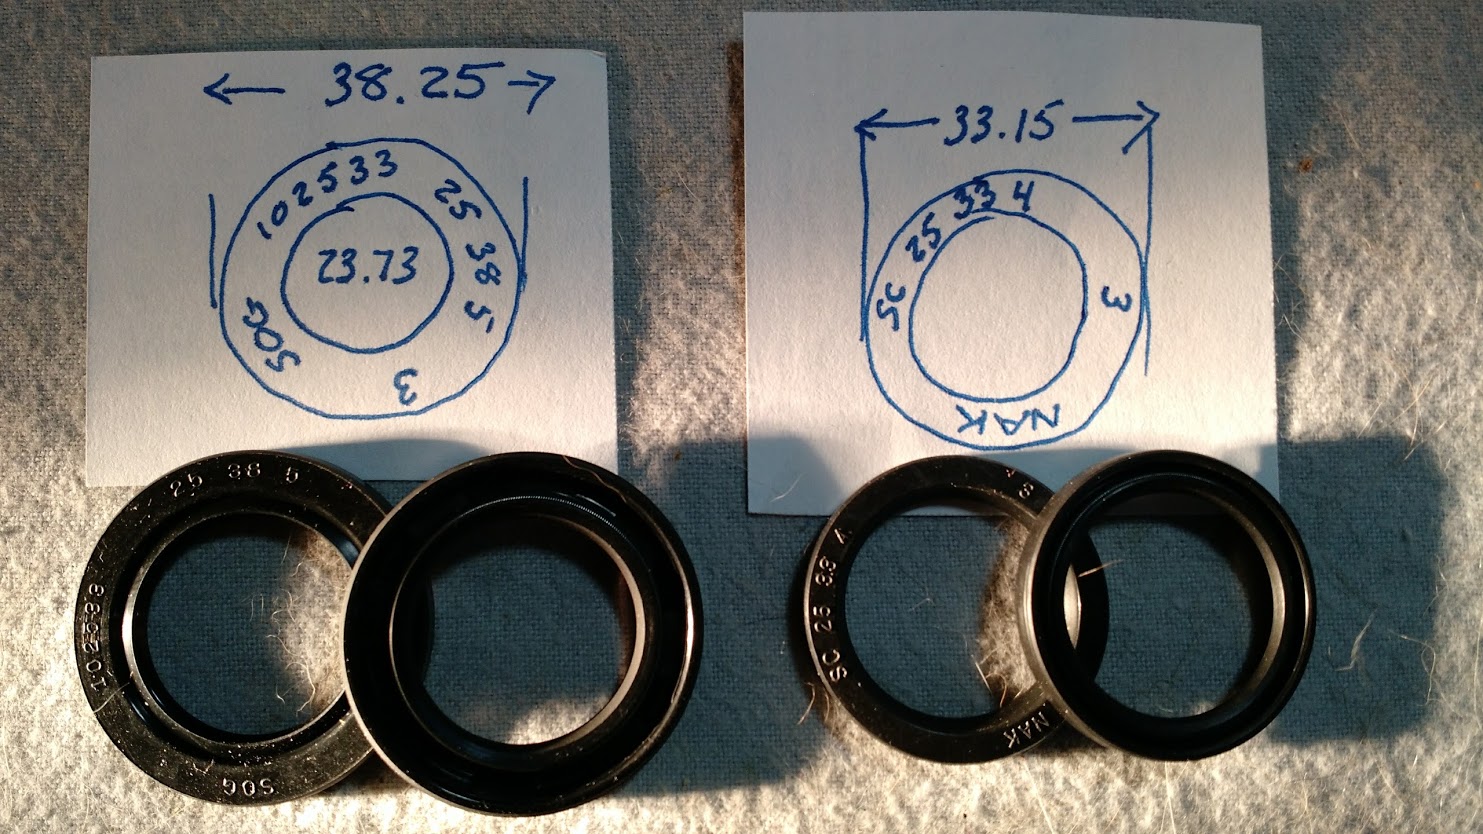
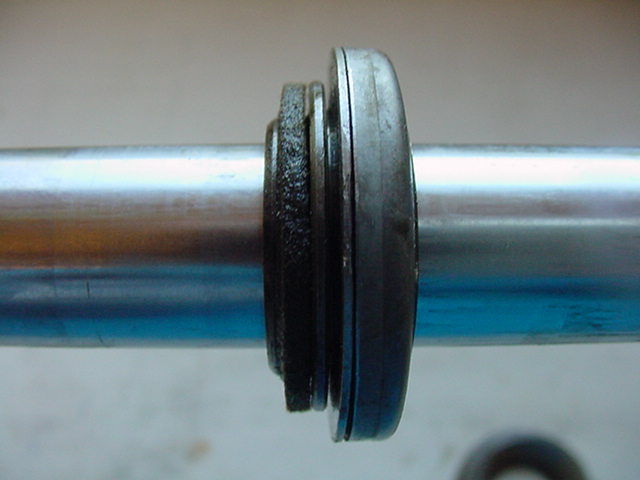
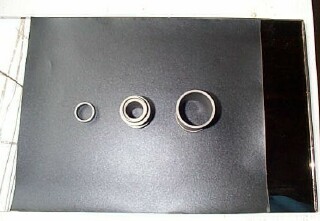
These are the Neoprene seals that were used from 1965 to the end of /2 production in 1969. The measurements are an approximation of the seal sizes. The size is on the seal, e.g., the seal marked 25 38 5 is a seal with a 25mm ID, 38mm OD, and 5mm width.
If you are not restoring for a competition show, convert over to the modern seal above. It is much better at sealing out the water. You will need to buy a hub nut and seal for each wheel.
A typical BMW /2 hub nut (seal holder) that was mangled by a previous owner. The tool may not work as it won’t seat into the 4 holes.
I have used a homemade tool, the factory one, and this one shown above. This is Ed Korn’s tool, Cycle Works, and it is the best one I have used. It not only fits the original holes perfectly but has that bolt that holds it in place from the other side so that it doesn’t try to jump out of the holes. It works on both types of hub nut. Get it, as it works and is bargain-priced.
This is just in case you can’t get the tool into the 4 holes. I hate doing this procedure, but sometimes I had no choice. Clean out the holes with a numbered bit, #15, which is .178.″ Only drill to the bottom of the old hole.
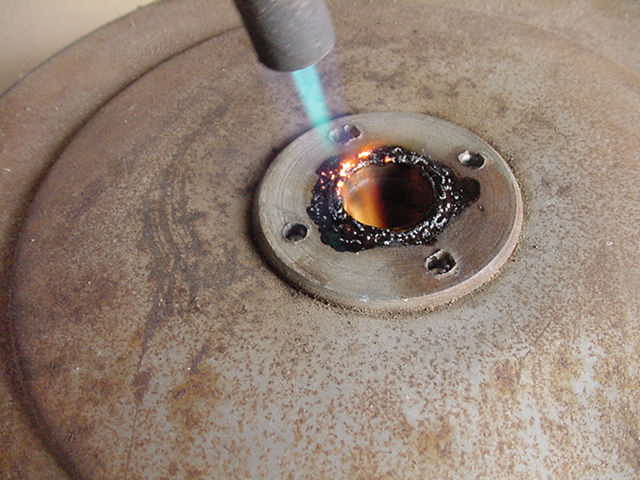
Here is another option in rare cases where the tool fails to get the seal holder loose. Use a butane/propane torch to heat the seal holder. Since they are both steel, there is no thermal expansion difference to exploit. What happens, I believe, is that the parts are forced by heat to do some moving, and the old dry grease is possibly able to lubricate the threads. When I do this, I allow it to cool completely again and then try the hammer gently.
This is what you will see as the dust cover is removed. The tool that you see is my homemade tool, not the “superior” one by Cycle Works.
Removing and replacing the old felt seals
This photo shows the axle installed in the seal holder exactly the way it would be on the bike. Use your other hand with a rubber hammer to tap the bushing and seals out of the hub nut. Do this with the axle only a couple of inches above a soft surface like a carpet. It comes out easily, and the axle will fall all the way through the hub nut. You don’t want it hitting the concrete from 3 feet and damaging the axle threads.

After it falls out and you take it apart, the pieces look like this. From left to right, hub nut, smaller felt seal, thrust bushing or top hat spacer, flat washer, larger felt seal, and its holder.

Here is another view of the parts in the same order as above. I doubt that one can get those felt seals today. Try Vech. If you wish to reuse them, clean them very thoroughly, dry them out, and liberally regrease them.
Here they are, assembled and ready to press or tap back into the dust cover. They should go into place easily, but if not, find a suitably sized socket to use as a pressing tool.
3. You are now ready to remove the stack. Insert the rear axle into the brake drum side.
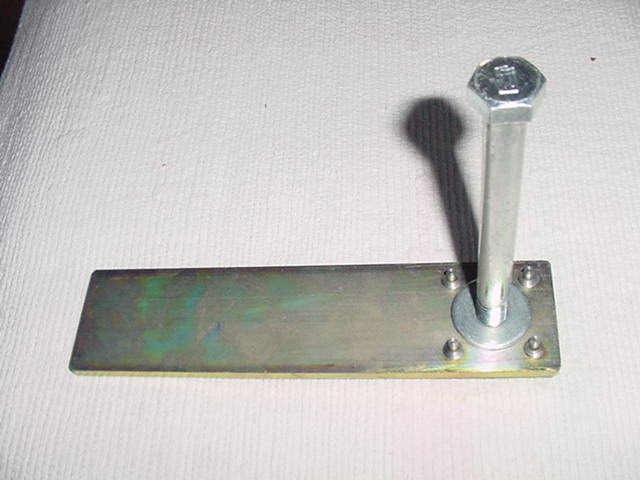
4. Install the tool, which is nothing more than a spacer. It is needed because the axle is too long. I use a 3/4 X 4 plumbing nipple, available from any hardware store. Depending upon the model of BMW, you may find that 4” is slightly too short. You need to fill that space. You can use the outside top hat as a spacer.
5. Put the washer and nut on the axle threads. The nut should tighten up on the nipple, which puts pressure on the bearings. This holds the “stack” together. Only a few lbs of torque are needed.

This is what it looks like with the axle installed “backward” with the “tool” in place, the nut holding it all together and ready to hammer out. I am using a bare wheel hub because I didn’t have a complete /2 wheel for the photographs.
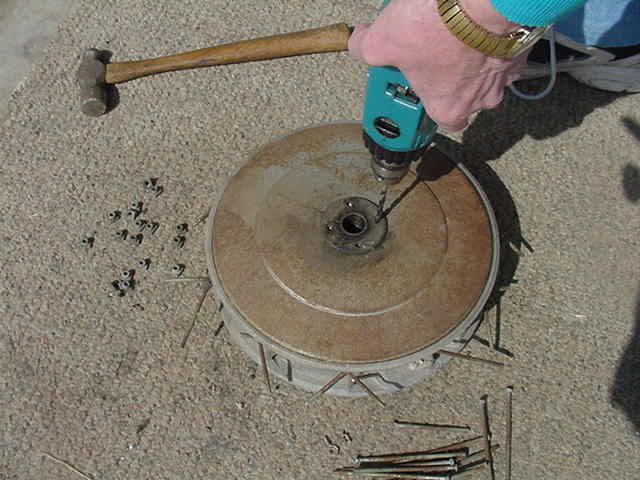
6. Do not heat the /2 hub. Use a dead blow hammer to pound the stack out of the hub. If it doesn’t come out easily, then it will need some serious hits. A “serious hit” is what you would use to pound a 16-penny nail into the wood in only 4-5 hits. Keep the axle straight so that the bearings stay straight. If the stack gets cocked off to one side, it will jam against the inside of the hub and may damage the steel bore. The stack may move as little as 1/8″ with each hit.
Do not use a hydraulic press to remove the stack. Several times, I have seen a hub ruined by someone using a press on the hub alone. There is nothing wrong with the basic idea, but if one fails to notice that something is jammed up, the hydraulics may have enough power to press it out anyway. That can ruin a hub, so I prefer using a hammer.
You may be nervous about hitting a good bearing. That makes sense. I was also unhappy about doing it at first. However, the BMW service school used that procedure. I was expecting premature bearing failures due to hammering but have never seen it. I think that it is better to hit it more times with less force.
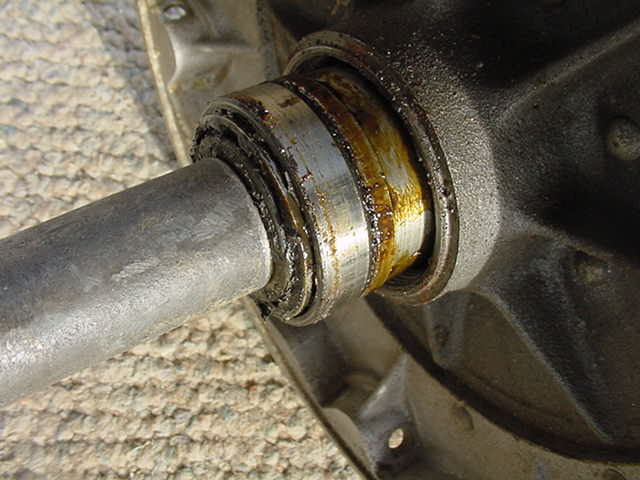
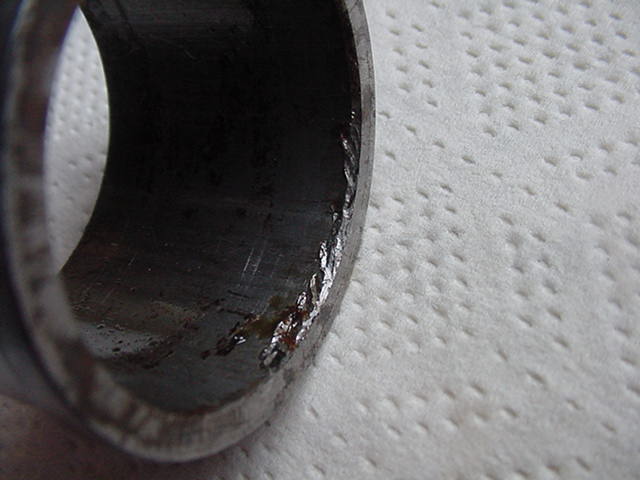
After you remove the stack, you will clean and inspecting the parts carefully. Pull the cone and clean the outer race well and examine it for telltale “dents” on the polished surface. You should find none.
This is what it looks like with the stack 1/2 way out. See the spacer tool on the left? This one isn’t a pipe nipple and so, therefore, has no threads.
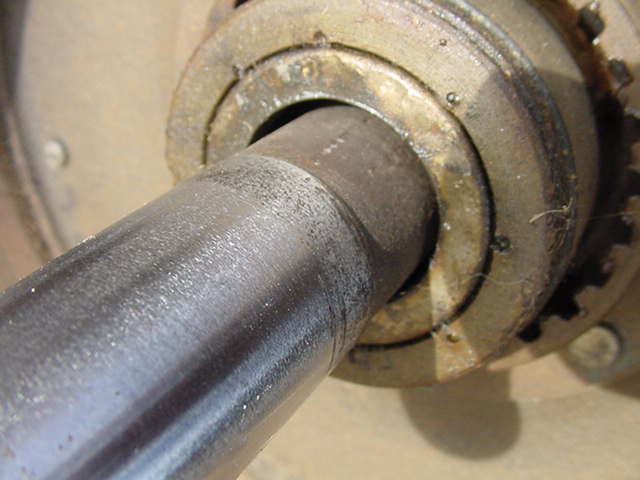
This photo shows the axle centered in the hub. The stack is 1/2 way out, and the extra space around the axle must be kept equal all of the ways around to be sure that the stack is coming out straight. If it cocks to one side, it digs into the hub and may damage the bore.
This is what it will look like when it is off-center. Just tap the axle sideways to center it.

This is what the stack looks like after it has been removed and wiped off.
7. Disassemble the stack, noting the position of the “inside” top hat spacer. There are two top hats, one on each end of the bearing stack. They are not identical. The “outside” top hat spacer will have stayed in the seal holder when you removed it. These top hat spacers are for one purpose, to transfer pressure from the axle to the bearing stack through the seal. Each top hat spacer rides in the seal, so it needs to have a smooth surface. A rough surface will chew up the seal, and that may allow dirt and water into the stack.
This is a typical inner spacer with old dried grease. This shows that the grease that is packed up around the inner spacer never gets hot enough to “flow” to the bearings. I use the softest grease I can find to try to allow it to flow if it ever gets hot. Properly spaced, they will never get hot. Don’t obsess over the grease, don’t use the old-fashioned stringy type used on cars.
This is the dried grease that has just been “chipped off “of that inner spacer. This is a commonly found situation.
What you see below is what will happen if you don’t remove the bearings as a stack.

As I pulled the stack apart, I found this disaster. This is the spacer (bushing) on one end, often called the top hat. It was just luck that my only hub to photograph happened to have signs of abuse. This is caused by someone removing the stack without correct information. The person just hammered them in or out without holding the stack together with the axle and 4″ spacer.
The other side of the same spacer.
The outer spacer has been hammered badly. This is one of the worst that I remember. In our shop, we would see this a couple of times a year. It makes me want to use the hammer on the guilty idiot.
The damaged outer spacer shows precisely where the person used a punch and missed the actual edge. This is proof that the person hammered it out in pieces. Had it been held in place as a stack, this area wouldn’t ever be available for hammering.
If you find such a disaster, all isn’t lost. You can dress the parts down with a file and get them close again. Then finish the job by lapping them using black paper with solvent on a glass plate.
I must thank Paul Stuverud for his assistance in some major edits in steps 8 to the end. This is one more example of a reader finding a situation I didn’t foresee and asking about it.
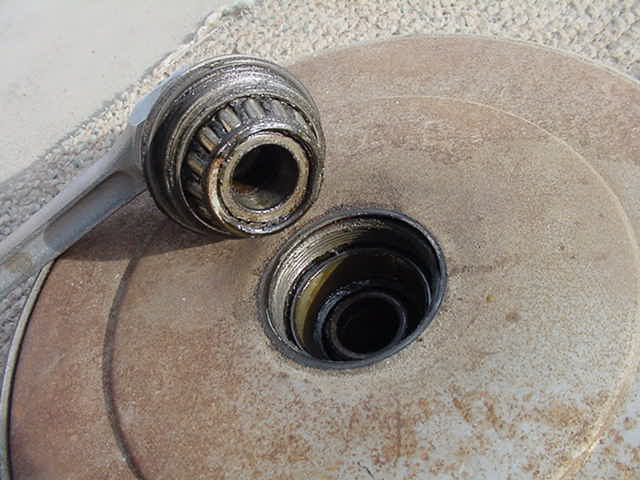
8. Clean the bearings and inside spacers of all grease and perform the following test for possible spun bearings. Take the cup that was on the left side, the one next to the hub nut, and do this test. Wipe the outer edge with a thin layer of light oil. Try to insert it back into the hub by hand. If it goes in, that is evidence that the bearing has spun in the hub. Now, shove it into the center space and try to shove it into the right side bearing mount. I have never done this, as a spun bearing in a /2 is very rare. However, I can assure you that you want to discover this failure now. It may well be possible to repair to save the hub. You will damage the hub beyond repair if you keep riding on one or both spun bearings. If you have a spun bearing, you must perform Step 14 after steps 9-13.
While one normally removes and installs the bearings as a stack, that isn’t the procedure with spun bearings. Install the correct top hat spacer in the seal. Buy bearing mount glue and glue the inner bearing race in place. After it is set, lube the cup portion of the bearing and install. Now insert the large outer spacer and the two parts that make up the inner spacer. When I say “two parts,” I assume that you may have used a shim under the wedding band to get the correct spacing preload. Lube the cone (the bearing part with the rollers) and lay it on the wedding band. Put your bearing mount glue on the cup’s outer surface and insert it. Allow the glue to set. You are ready to install the final top hat spacer, hubcap spring, and seal holder. You may ignore the following steps because you already did them.
9. Inspect the bearings for pitting and stains from water. Replace as needed. I don’t currently have any bad bearings to show, sorry.
You aren’t ready to do the spacing just yet. This part of the procedure is my addition, but it is worth the trouble.
First, inspect the wedding band spacer, the large outside spacer, and the larger part of the inside spacer with a good eye or magnifying glass. The machined ends are usually poorly cut. Clean faces offer more surface mating areas. This will give a more solid feel to the preloaded stack.
Second, the ends should be parallel to each other and square with respect to the length. About all that you can do is to get them parallel.
I lap them to be smooth and as parallel as I can measure. I use a glass plate as my surface and #400 grit black paper for the abrasive.
The waterproof paper is on a glass plate.
Add solvent to the paper to reduce its tendency to clog up. As they start to clean up, check for parallel-ness if you can.
10. With only a drop or two of oil on each bearing, reassemble the stack on the axle. Put the washer and nut on, and finger tighten it.
11. Put the axle, with the stack, in a vise vertically, and tighten the vise on the nut.

12. This is the procedure shown in the BMW shop manual. This procedure is to get the spacing into the ballpark. Use the tommy bar, or a screwdriver, in the axle hole to tighten and loosen the axle. As you slowly tighten the axle, continue to rotate the bearings by hand. The large outside spacer should be easy to move sideways. That’s the visible part between the two bearings.
The reason that this isn’t good is quite simple. Once the stack has been installed into the wheel hub, the hub squeezes down slightly on the bearing cup. This may be hard to believe, but it is true. The result is that the spacing is now tighter than when the stack was held in the vise. The variation is not in the bearings, as they are made with precision. The hole through the wheel hub wasn’t controlled nearly as precisely. It is also possible that removing and installing the stack has altered the size of the bore.
13. Using the stack in the vise test, BMW wants you to change the wedding band spacer until you reach the correct spacing. With shims, you can add them until the correct spacing is reached. You are finished when the outside spacer moves with medium thumb pressure, at 20-25 lbs of torque. Since you can’t measure the torque easily with the stack in the vise, make it fairly tight.
See below to order the shims.
14, (Perform only if you found a spun bearing in step 8) While one normally removes and installs the bearings in a stack that isn’t the case with spun bearings. Install the correct top hat spacer in the seal. Buy bearing mount glue and glue the inner bearing race in place. After it is set, lube the cup portion of the bearing and install. Now insert the large outer spacer and the two parts that make up the inner spacer. When I say “two parts,” I am not counting that you may have used a shim under the wedding band to get the correct spacing preload. Lube the cone (the bearing part with the rollers) and lay it on the wedding band. Put your bearing mount glue on the cup’s outer surface and insert it. Allow the glue to set. You are ready to install the final top hat spacer, hubcap spring, hubcap, and seal holder. Now go directly to step 17.
15. Lube both bearings with grease and assemble everything on the axle. It isn’t possible to use too much lube. Tighten it up to about 10-15 lbs.
16. Drive the correctly spaced and lubed stack back into the hub. It will go in with about the same hit as removing them. If you like to go to extra work, heat up the hub and freeze the stack with the axle. The stack will go in very easily that way. It may even fall into place with no hammering.
17. Install the seal holder hand tight, but don’t tighten it down with force. Remember, tightness plays no part in the bearing or sealing function. Making it tight now only ensures that it will be hard to get off later.
18. Install the wheel and axle. To reinstall the axle, be sure that you know how to do it or use this article to see the correct and incorrect way. Go down to the picture of a /2 rear axle. I will describe what to look for. See the right side of the hole in the axle for the tommy bar? Notice the distance from it to the swingarm. Now, go to the other side of the swingarm and notice the distance to the ridge on the axle. Those two measurements should be the same. When an error is found, the right space is always less than the left space. That is because some idiot tightened up the axle nut without the axle being fully seated in place. That pulls the left swing arm in towards the wheel. The installer should have rotated the axle with the tommy bar, and that would allow the swing arm to “pop” back to where it should be. After a few months or years, the swingarm takes a new set and is now bent. Just pull it back out to the proper place and tighten the swing arm pinch bolt. Over time, it will take a new correct set.
19. Perform the “shake the wheel” test to check your work. It may tighten up at a slightly less axle nut torque than when originally spacing it. A shim can be added to correct it if it is way off.
How to obtain shims
Scottie has stopped selling shims as he is running low. They can be purchased from a business in Norway.
This is his new address.
Scottie’s Workshop
3282 E. Hwy 4
Murphys, Ca. 95247
408-475-2696
Warning to obsessive/compulsive owners
I got an email explaining that the owner found that he needed a shim of .0025″. That is between the 2 and 3 sizes. The “shake the wheel test” is far more accurate than needed. Keep in mind that BMW was happy with providing steps in size for the /2 the wedding ring shims were .004″ (.1 mm) apart in size. While I think that is a bit much, getting down to less than one thou (.025 mm) is just not needed. Besides, if you want it that close, then lapping the wedding slightly will get it. Remember, it is better to be too loose than too tight, so the owner should have used the .003″ shim in this case.
Updated 15 July 2022