
My “maintenance free” stair project
We built our house and moved in during the Gulf war in 1991. I didn’t get around to building the outside stairs from the radio room on the second floor to the ground until 1994. They were traditional stairs made of wood. This meant that they were painted. I painted the pieces before installing them. This meant that they would need to be repainted eventually. The “eventually” turned out to be only 5 years. Signs of cracking and peeling paint were starting. After 8 years, the wood was quite stressed, and something had to be done. No way was I going to keep painting stairs. To paint them would mean either taking them apart or doing a very poor job of it.
I took the whole stairs apart in 2002 to repaint them. Well, I just couldn’t bring myself to go through this unending process. The parts just sat around for a year while I thought about how to do it differently. The perfect solution would never need any maintenance. While such a thing is simply impossible, if it would last through my “anticipated” life, that would be satisfactory.
The local lumber supply place, Foster’s Lumber in Lodi, had a new type of artificial wood material called Trex. It is sawdust held together by recycled milk cartons and other plastic. It didn’t need to be painted, and it only weathered a small amount. It was made in various colors and sizes. The stuff was expensive compared to wood, but I didn’t really care much, as any material that didn’t need to be painted was worth any cost. The main disadvantage for me is that it had no structural strength. It needed to be “held up” by something. That “something” must never need maintenance.
Getting the best price was interesting. I called 3 suppliers for bids. One well-known lumber yard never returned my call with a bid. Guess they have too much business to mess with my small $1000 order. Foster’s was the supplier for all of the lumber for the house 14 years ago, and they have always treated us very well. That is worth more than saving a few cents here and there.
I am a ham radio operator, and the main reason for this 3-acre property was to have room for radio towers. I had a few towers lying around, not being used. The Ham radio tower sections were made by Tri-ex and are called T-9. They are triangular, in 10-foot sections, and made of hot dipped galvanized iron. The old used ones were already 20 years old and showed no signs of deterioration yet. They are cheap and strong. Besides, I already had them, so no cost at all. Could Ham radio tower sections be used as the structural part of stairs? How about strength?
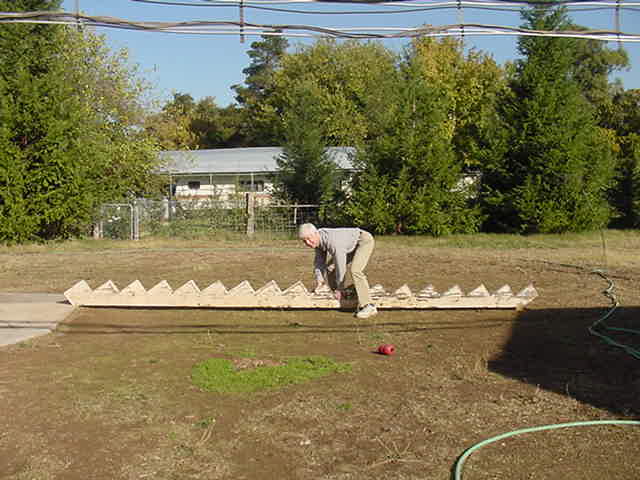
This shows me testing the old wood risers for “bounce” or flex. Both of the old risers are supported on each end, and Linda, my wife, would measure the amount of “sag” when I put my weight on the center of the 18 feet of board. In this picture, Linda is taking the photo, so you can’t see the very simple measurement. Then we checked two tower sections that had been bolted together to make a 20-foot piece. One single 20-foot tower showed only 1/3 of the flex as the two 18-foot wood risers. That was enough for me. Tower sections it would be, but how to do it was the question. Nobody uses them in anything but a vertical position. I cut them down to about the same length as the wood and at an angle. How does one attach that to the 2X12 that was cantilevered out of the house?
While a single tower would be stronger than the previous wood, the tread made of Trex needed support every 12″ in this application. The stair treads were 41″ wide, so I needed a minimum of 3 supports. Two towers with the apex down would leave 4 legs on the upper surface available for support. The disadvantage of that scheme was only that I would have to buy more Trex and hardware to attach it to the 4 tower legs. I decided to use 3 towers with the apex up. While it would require 20 feet more tower, it would take $40 less in Trex. The tower was just sitting around, so that was the way I decided to go.
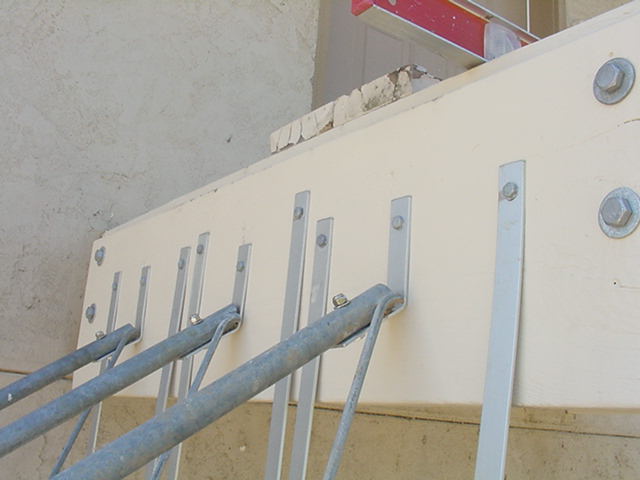
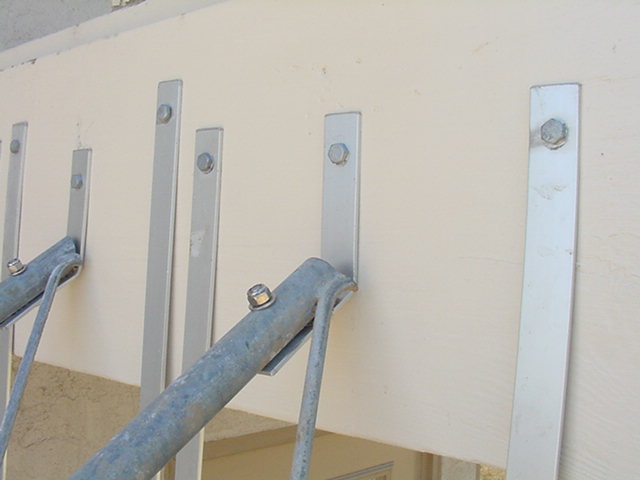
I used 1/8″ by 1″ wide aluminum straps to attach the 3 legs of each tower section. The picture on the right shows the hardware better. It is all stainless steel for longer life. The bolts go through the wood in a staggered line. If all of the holes were in a straight line, it might encourage the wood to split along that “dotted line” that I had drilled.

This shows that I paid a lot of attention to getting all 3 towers mounted in a level plane. It wouldn’t really be noticeable if one end of a 41″ stair step was higher than the other, but I am compulsive about such things. Unanticipated errors seem to have a way of creeping in any way. Why start out with them? You can see that Trex is attached to the right tower.

This is what it looked like with all 3 towers attached to the house.
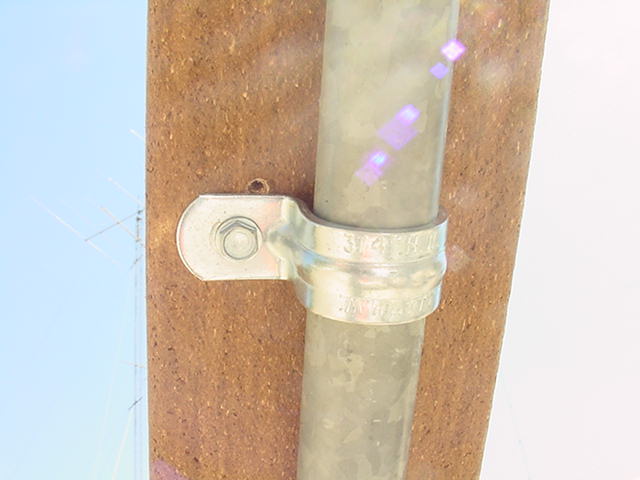
A view of the fasteners used to attach the Trex runners to the towers. It is electro-galvanized conduit clamps. The clamps and hex screws are the least durable part of the whole project. They are mounted on the underside of the Trex and should last for years. If I can find hot-dipped galvanized clamps, I can easily change them later.

The front view
I needed to cut and attach triangular pieces to the runners to make the “risers” like the wood ones. I would need about 60 of them. They would need to be cut quite accurately. I made up a “miter box” to cut them easily and accurately.
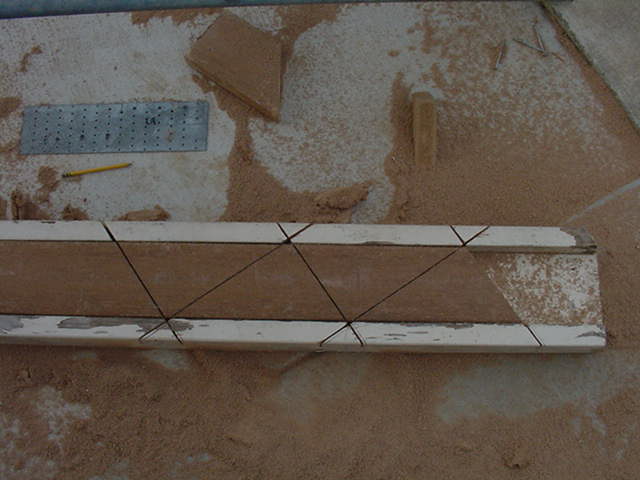
Some of the old stair wood makes the miter box. You see several risers already cut.

Some of the risers with deck screws started in the holes. Mass production is the key to speed and accuracy.
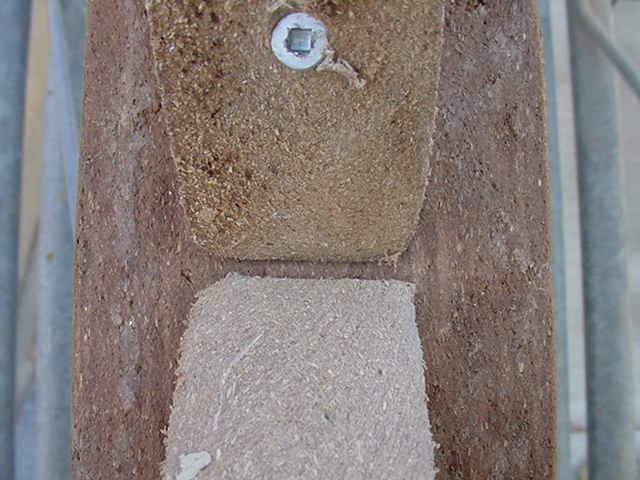
A close-up of two risers mounted. This shows the deck screw head is already damaged by the bit jumping out of the square hole. I wasn’t too impressed with that type of screw head. They were no better than the Phillips type.

This shows the level across the runners before the risers were added. A constant check of plumb and level was necessary for a decent finished product.

A string line was used along one side to keep them aligned. To get a 12″ wide tread, I used two 6″ wide Trex boards. It was cheaper, and this gave a place for standing water to go. The 6″ deck Trex is flat across the bottom and arched across the top to encourage water to flow away to each side.
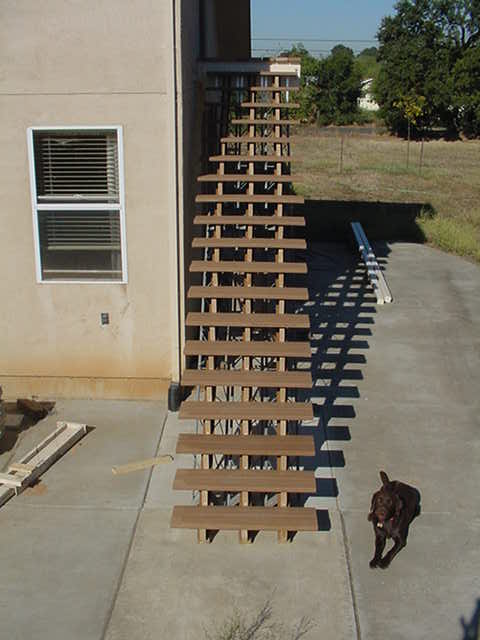
Standing on my tallest step ladder is this view. It makes one a bit nervous to walk up and down stairs that have no handrails. That is Hershey, our new chocolate Labrador retriever. He was a big help. The handrails are also made of Trex. They are a bit flexible but should be OK for the purpose.
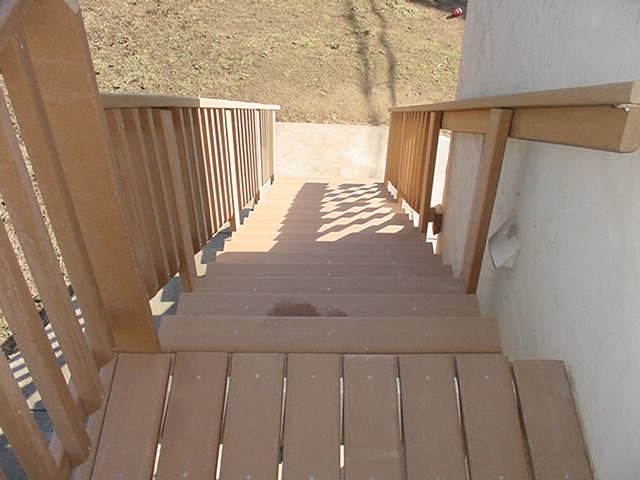
Top, looking down
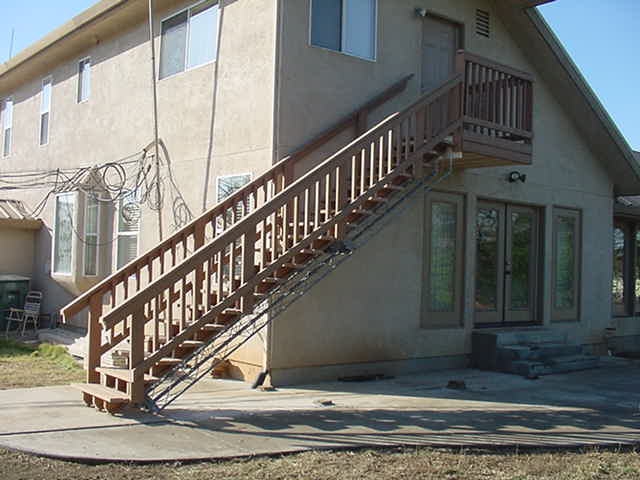
Views of the finished product. Linda is very happy.
I recommend Trex for this type of use. We plan a deck of Trex for next summer. Foster’s didn’t stock our color, and we had to order it and wait for the next shipment. Working with Trex is a bit different than with wood. It cuts easily and has no knots with which to contend. It drills and shapes easily. The stuff is very heavy, and that must be considered. Our original wood stairway had 4X4 posts in the middle of the 18-foot run for vertical support. The stairs made of tower sections have no middle support and are far more rigid. If I had to buy tower sections, I would use Rohn 25, a very popular tower.
An inspection of this stairway showed that the Trex had failed badly by 2019. I had been warned that some defective product had gone out. I guess that this is an example.
Updated Updated 28 Sept 2019