
Click for /5 brake info and /2 telescopic fork US models
/2 front drum, rear brake repair, and adjustment
This page is about the /2 motorcycles with Earles forks with front and rear drum brakes, from 1955 through 1969.
For modern linings or full shoe and backing plate service, I recommend dealing with Vintage Brakes. Michael will take good care of your brake needs.
The /2 double leading front drum brake is a good brake. “Leading” is good, and “trailing” is not good for braking. The brake doesn’t work well when rolling backward. That is because it is double trailing rolling back.
Examination of the /2 front drum brakes
This is where I always start. Slowly pull the front brake hand lever while watching the right side of the drum brake. A few things should be observed. The two arms should move about the same amount. They should move easily and without any jerky motion. The rear arm should move forward first, and when it stops, the forward arm should begin to move rearward. You may find that one arm doesn’t move. That arm is sticking due to corrosion, and that is not uncommon. Reach down and try to move it by hand away from the other arm.
If you find that the front arm moves first and then the rear arm, that is because the brake springs are installed incorrectly. That is not uncommon. This observation tells you that to make the front brake work properly, you must take it apart and assemble it correctly. It probably needs it anyway.
When the brake backing plate is off, an examination of the front brake springs will show you that they are made of different diameters of wire. The larger diameter wire spring is stronger. The rear arm moves first because its spring is weaker. When that shoe contacts the drum, the rear arm stops moving, and then the front arm with the stronger spring begins to move. So the two levers move at different times to pull the shoes up against the drum. The cam is the stop or resting point of the lower shoe. This cam determines the distance that you must pull before you start to get brakes. It won’t change the amount of braking action you get, but it will change the amount of play before you start braking.
You have found that the arms move freely and in the correct order. Don’t start to think that you are home free.
Fixing the /2 front drum brakes
The biggest reason for weak front brakes is that one or both of the shafts that the arms rotate are tight in the bushings. It is a bear to remove the springs/shoes and isn’t even needed. Before one removes the arms, refer to the photo below to see if the arms are in the correct position. If they are, mark the shaft with a punch, as shown in the photo. This will save you some time. See the “alignment” mark at the top of the shaft, right at where the arm has the gap? That way, one can reassemble it exactly as it was. If you are unsure that your levers are on in the best place, you can look at these photos to help decide. Use a lever to lift the shoe off of the cam that operates the shoe. Then pull the shaft out for cleaning and lube. You may need to tap the shaft out if it is stuck. Don’t use any lubricant such as WD40 because it may get on the brake friction material, and that will ruin it. Clean any corrosion or dirt.
The adjuster cam should always be checked for being easily adjusted. It may have to be removed, cleaned up, and lubed with grease.
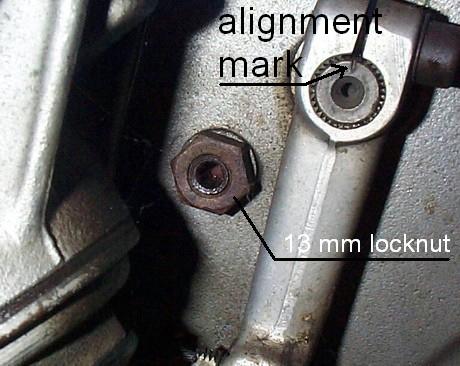 Photo #1
Photo #1 is of a /5, but it is the only photo that I have to show the mark. This will save you some time. See the “alignment” mark at the top of the shaft, right at where the arm has the gap? That way, one can reassemble it exactly as it was. If you are unsure that your levers are positioned in the best place now, you can look at the photo to help decide.
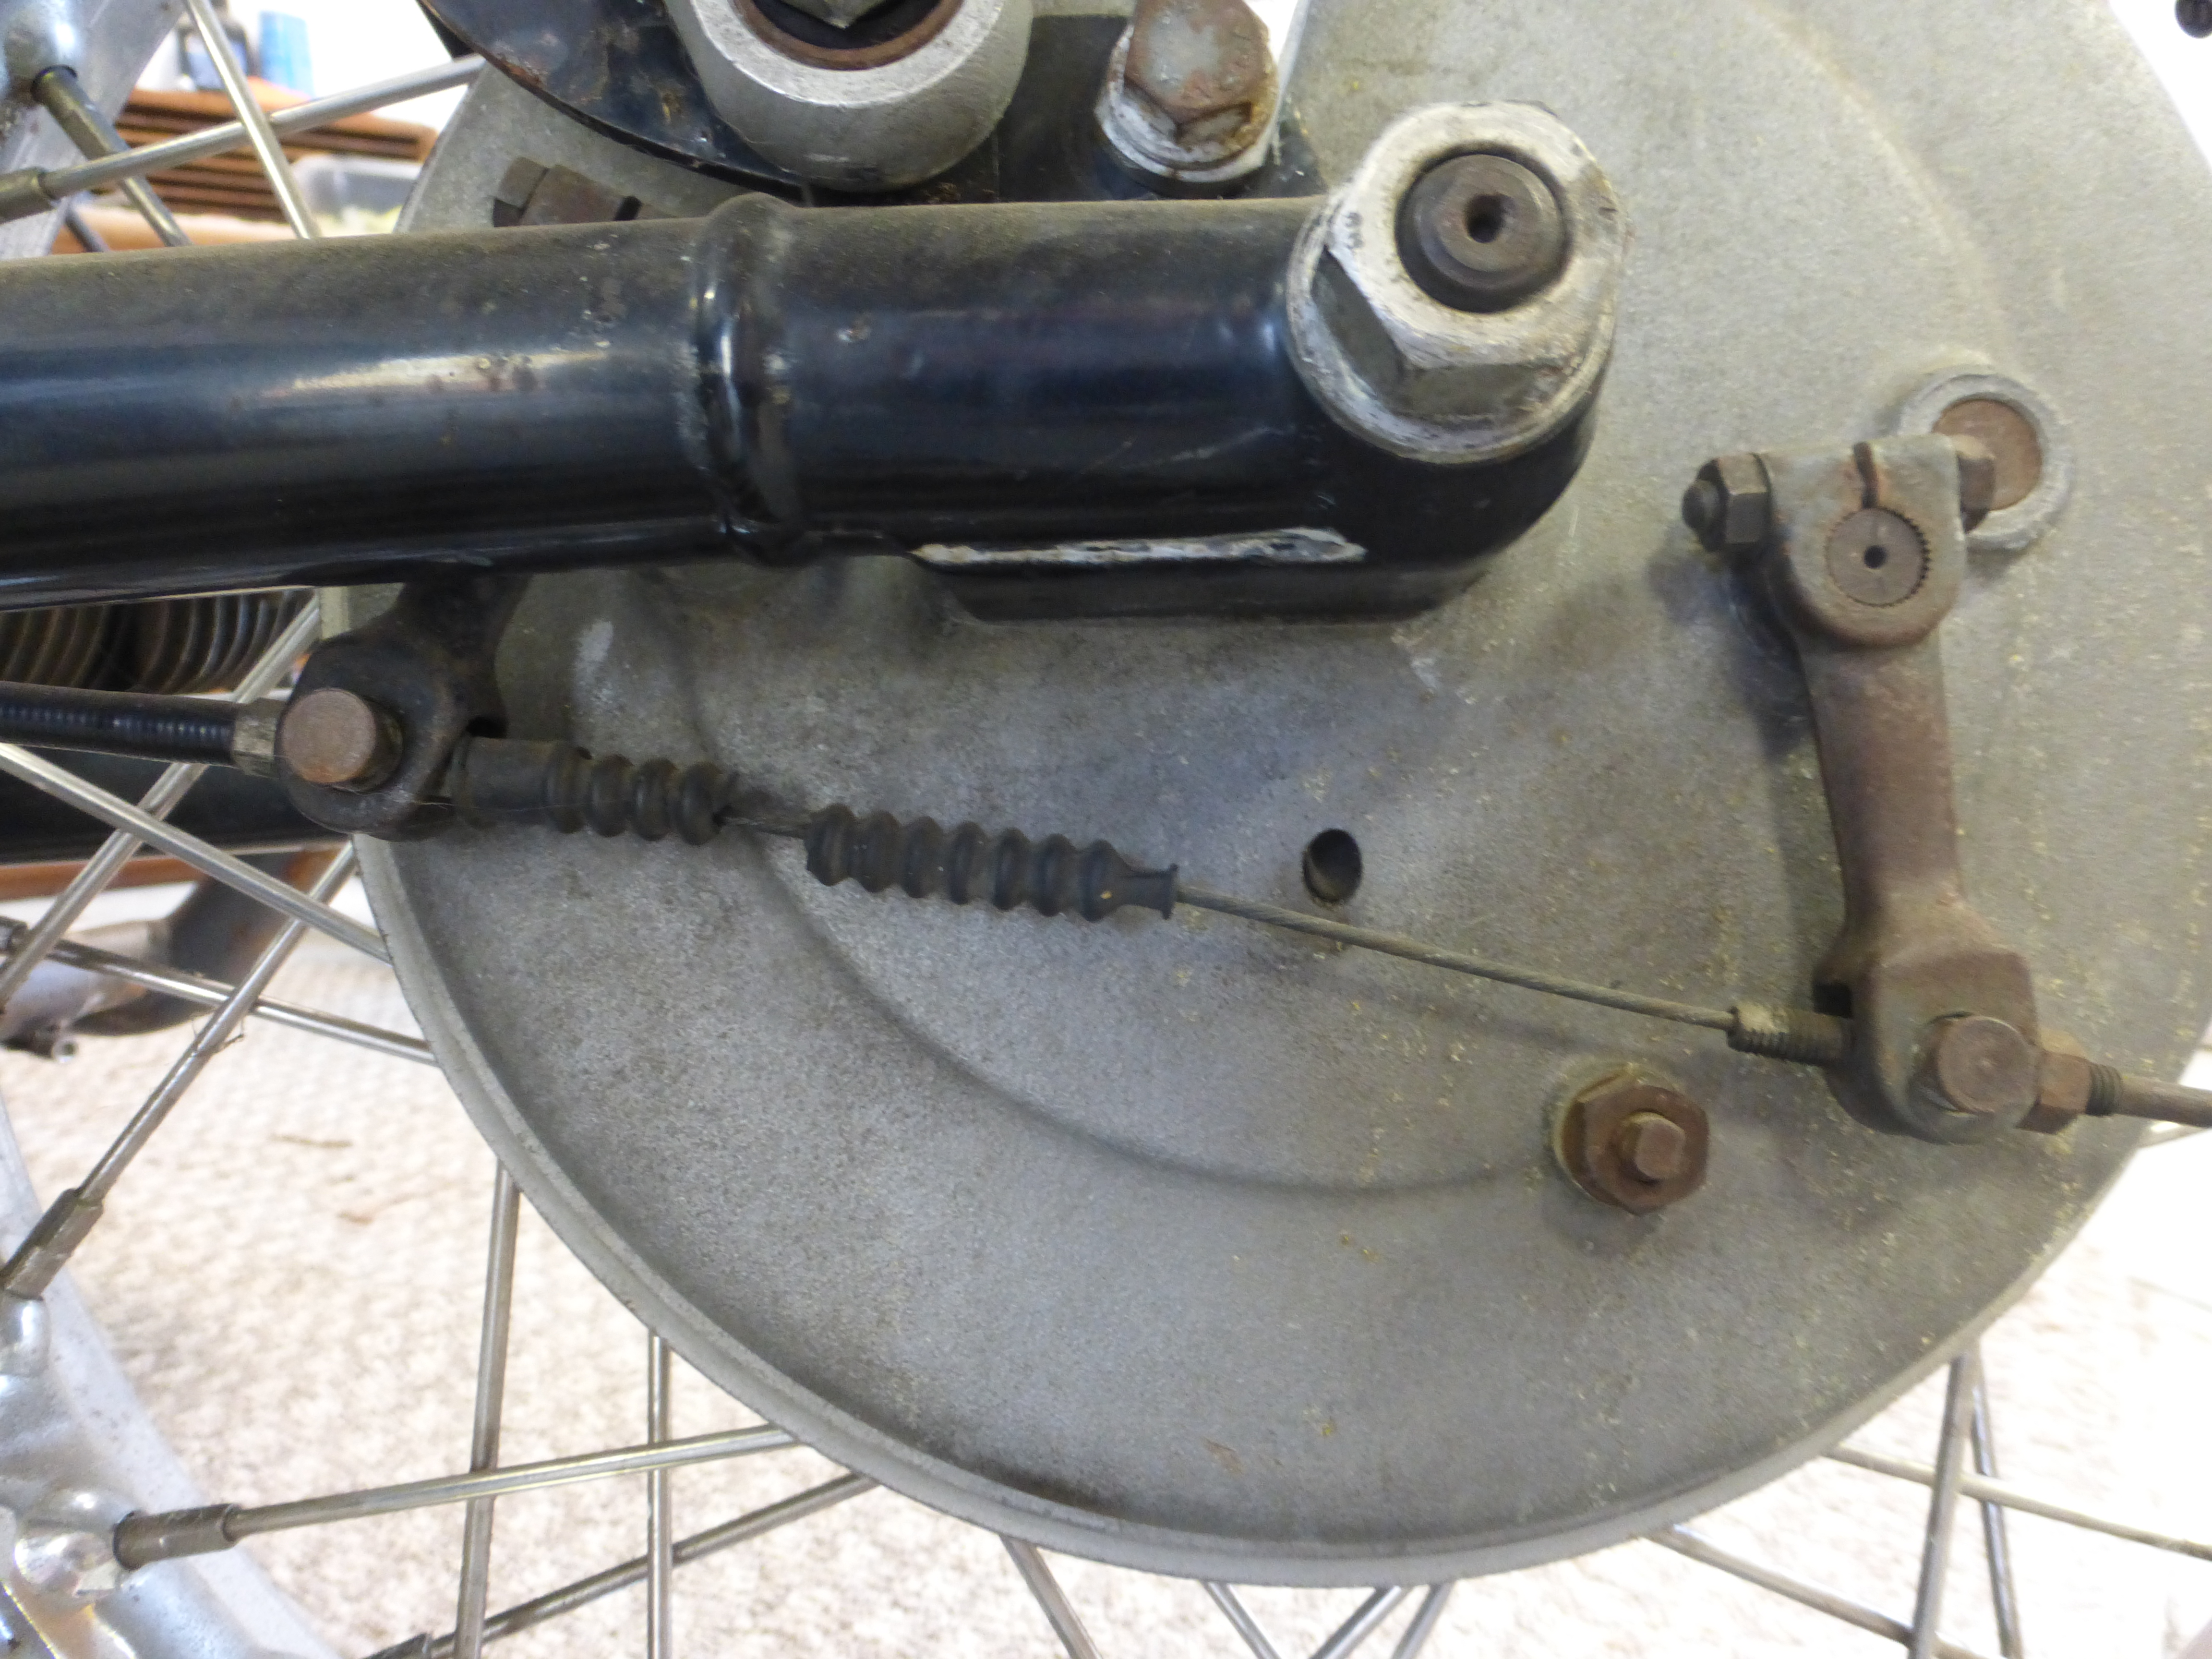 Photo #2
In photo #2, you can see the angle of the brake arms? Your brake arms should be about this same angle. Measure the distance between the two brake arms at the lower end. It should be “about” 7 inches center to center.
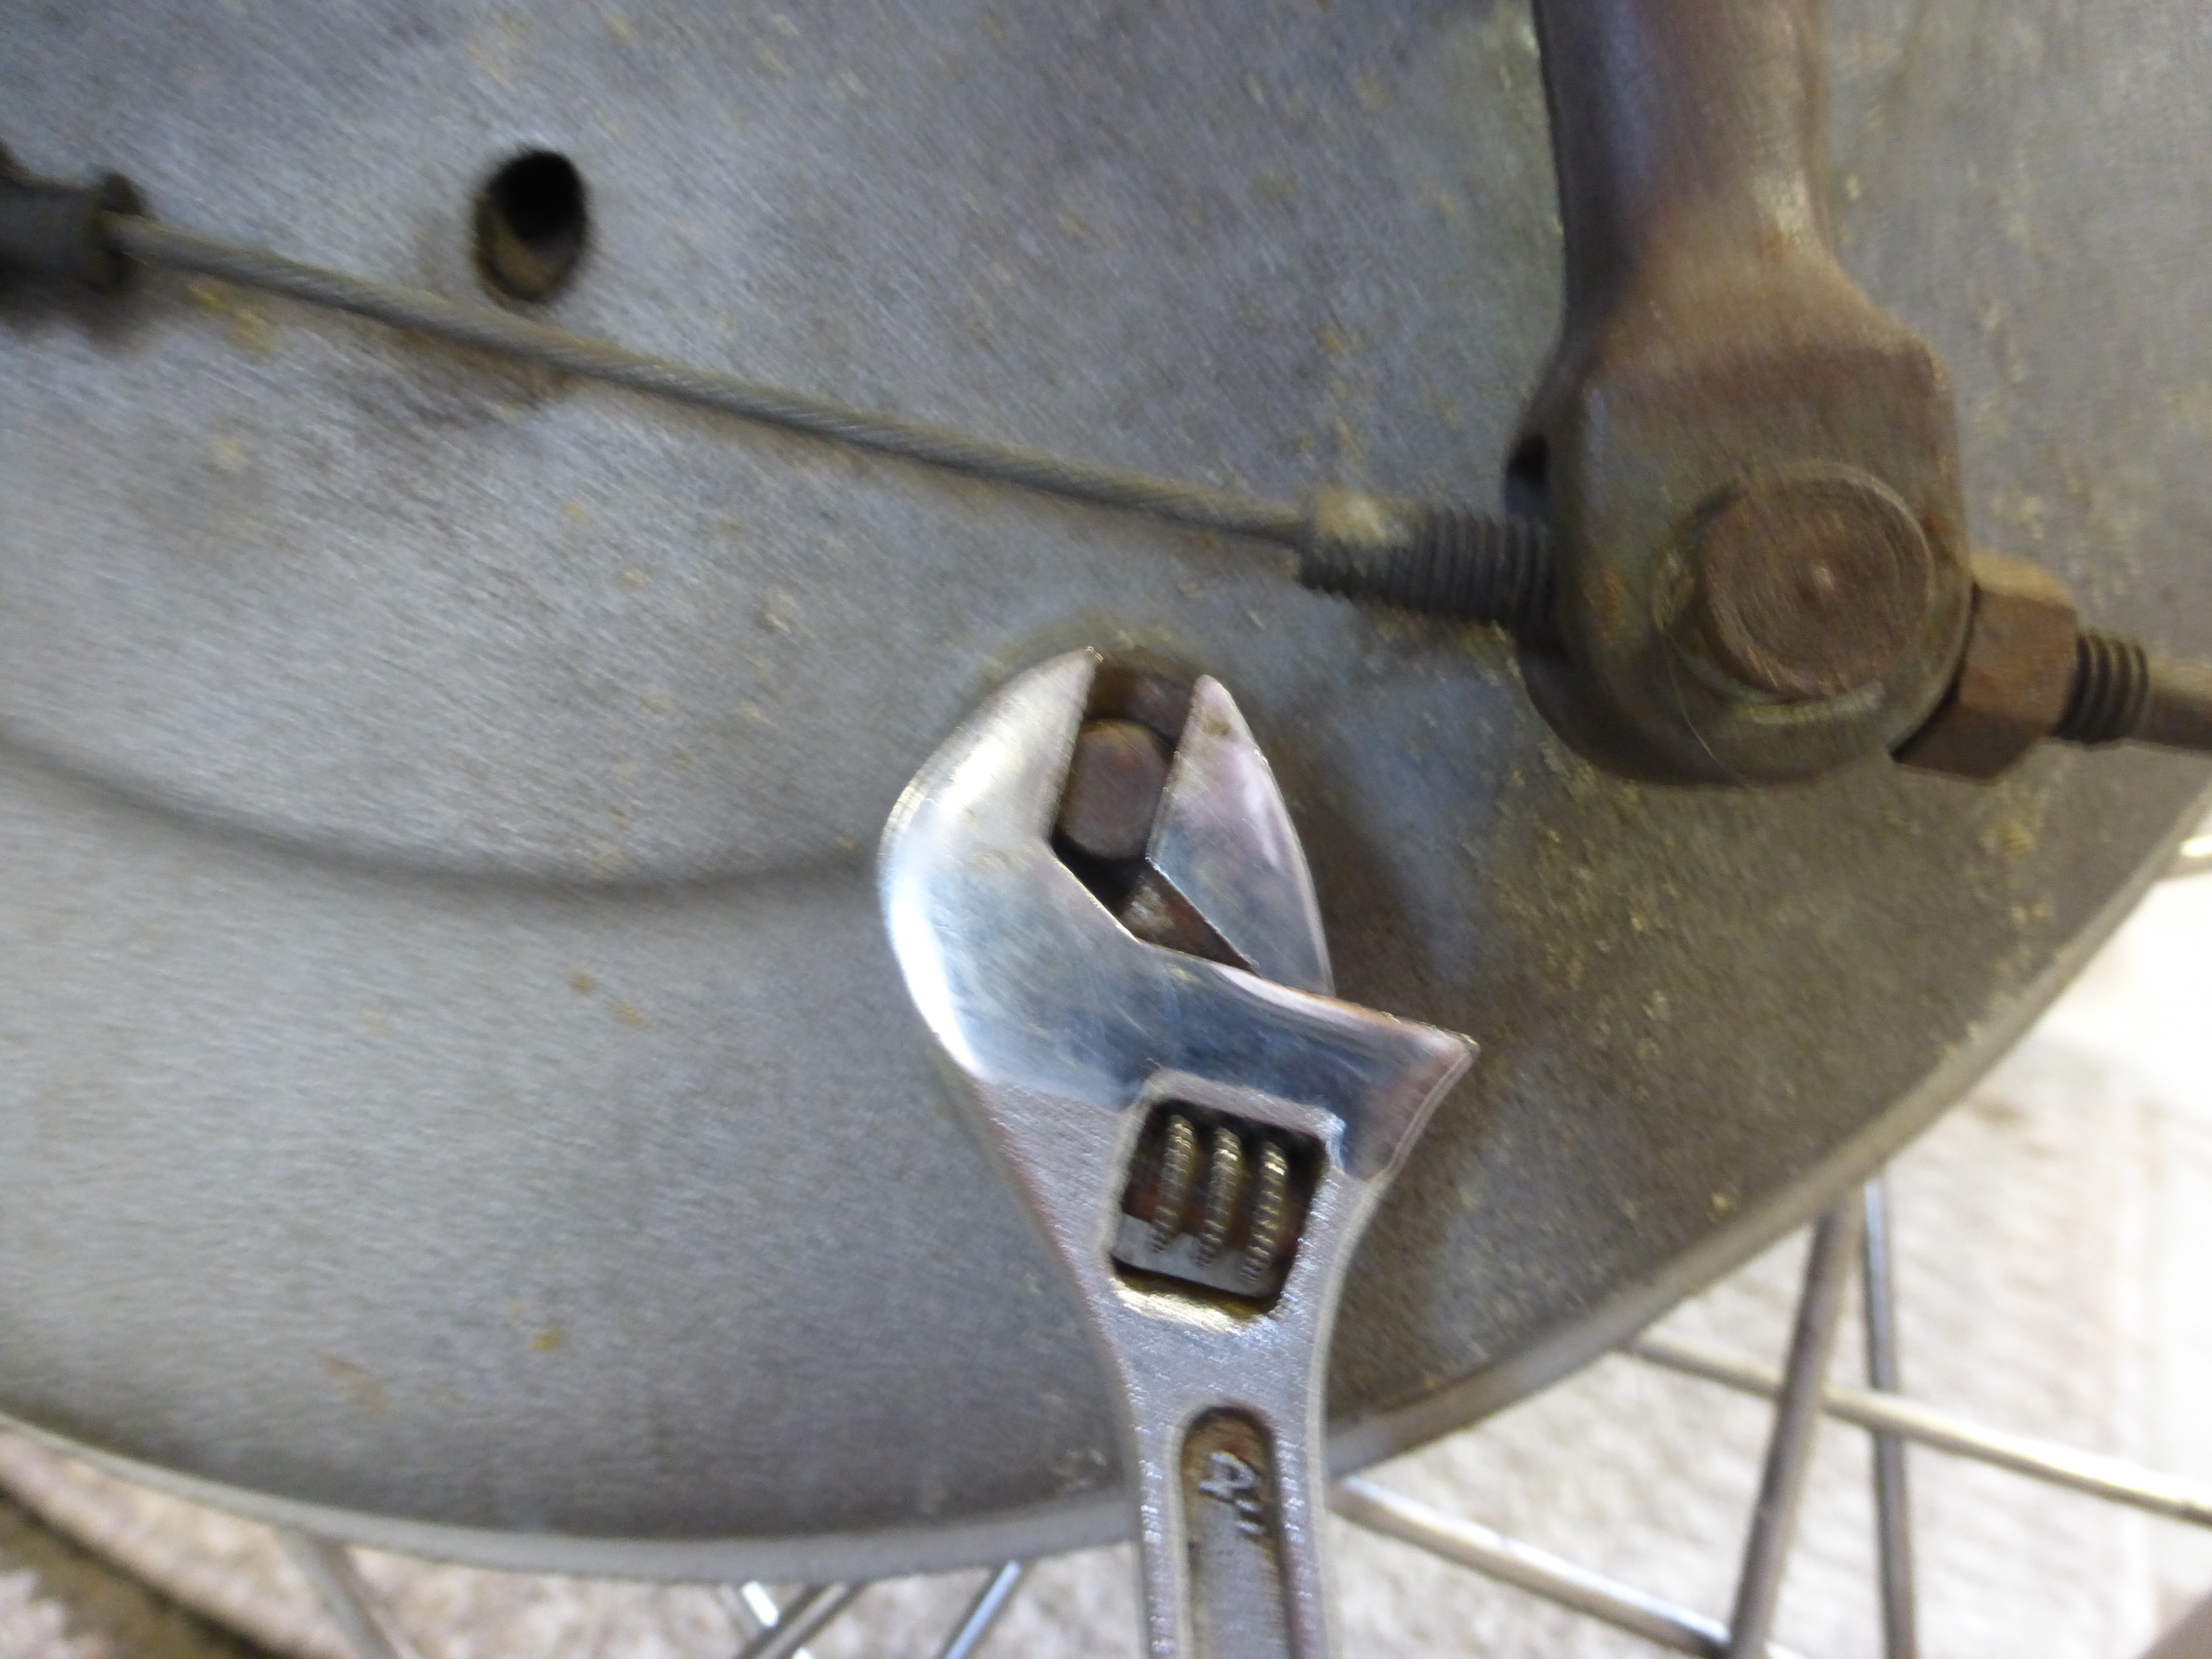 Photo #3
Photo #3 shows the /2 cam adjuster with a wrench on the two flats to adjust the lower shoe’s resting place. It is best to use a 5 mm open-end wrench, but none was available for this photo.
This doesn’t apply to the 1968-69 US models. Go to the /5 brake page for that info.
First, confirm that the arms are installed correctly. Then set the front arm travel first. It should have about 3-4 mm (1/8″ to 3/16″) of travel. Don’t obsess over this measurement, as you may make a slight adjustment later.
To adjust it, you must adjust the cam, as shown in the photo above. The screw can’t be adjusted due to pressure from the brake shoe. To remove that pressure, reach up and pull the front brake lever with your left hand while you turn the wrench to its limit with your right hand. Turn the 5mm wrench either way, as it amounts to the same thing. Back it off a “smidgen” and tighten the lock nut when it comes to a hard stop. The thing I can’t tell you is what is a “smidgen.” To test it, tighten the locking nut, pull the brake lever and release it a few times. Check the travel distance of the arm. Also, the wheel should spin freely, which means it has no brake drag. You want the least amount of lever movement that still has no drag of the wheel with brakes off. This will get you very close.
Measure the distance between the two brake arms at the lower end. It should be “about” 7 inches. Put the forward arm in the position shown in the photo above and then the rear arm last by measuring it. Moving the arm, just one tooth will move the end of the arm by about one cm (almost 1/2″).
Now it is time to set the rear arm travel. It should move about 1/4″ (3-4 mm) total. The adjuster at the hand lever on the handlebars should be adjusted about 2-3 threads out. This gives you the freedom to make quick adjustments without using tools. Now you are ready to adjust the rear arm travel with the cable adjuster at the front lever arm on the backing plate.
New linings may not be “worn in” for some time. Just make sure that you have no brake drag. The cam will need to be adjusted at about 1000 miles. The total play will reduce as you adjust them for wear because the shoes are worn in better.
The two levers should swing about the same amount. Adjust until the movement is minimum with no brake drag. When you are finished, the hand lever should pull in about 1/2 way and come to a solid stop. Test it carefully the first time that you test ride it, as it may be quite different than before.
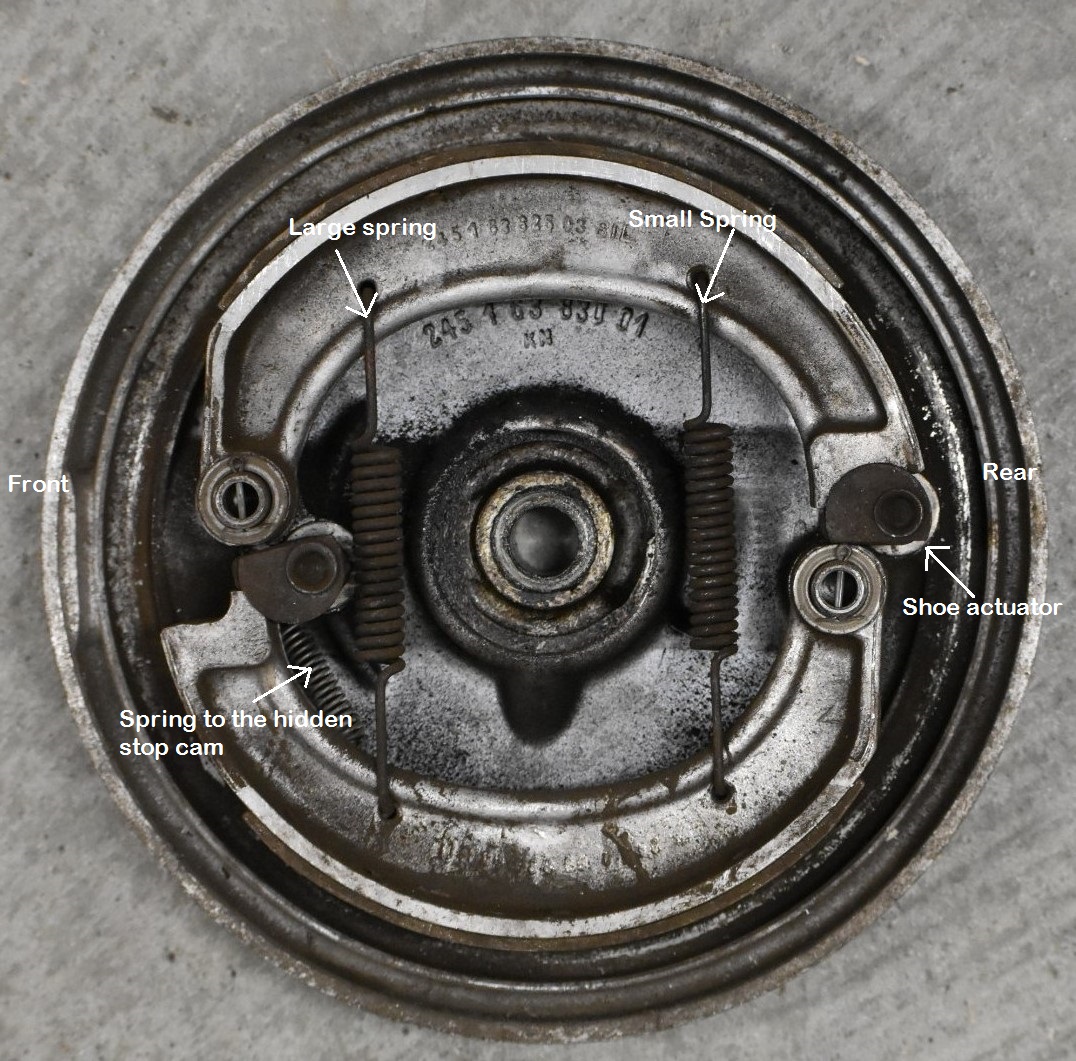 Photo #4 Photo supplied by Matthew Wilson
Photo #4 shows the backside of the backing plate. The various parts have titles.
Rear brake repair and adjustment
It needs some attention if you can’t easily lock the rear wheel with moderate foot pressure. The usual cause is grease or oil from the final drive soaking the friction material. They can’t be washed off like the /5 and later shoes.
Removing the rear wheel
This procedure may vary a lot, depending upon the year and accessories. A wider tire than BMW specified will make the job harder.
Make sure that the bike is on the center stand and very stable. Often, old center stands are bent and don’t lift the rear wheel off the ground. You could insert a 2X6 under the stand. I recommend having a person help put it on the 2X6. It is a very good idea to tie the center stand in place for safety.
Back off a few threads on the swing arm axle pinch bolt. No need to remove it.
Remove the axle nut and washer.
Use a bar to rotate and pull on the axle. It should come out fairly easily.
You may need to back off on the rear brake adjustment wing nut a bit.
From the left side, you should be able to gently pull on the wheel to get it off of the brake shoes. If the shoes are fairly tight against the drum, you may need to rotate the wheel a lot while pulling it off. What happens is that the shoes can try to go with the wheel. They get cocked a bit, and that actually makes them tighter in the drum. Now it won’t move at all. That is why rotating helps.
The rear fender section unbolts and lifts up and out of the way. The wheel should wiggle out of the area. The wheel should easily roll backward and away from the motorcycle. If not, read the next step.
Have a helper tilt the bike over on the right side and hold it. Now the wheel can come out of the bottom and miss the muffler and fender. If no helper is available, then use something to cushion the right side valve cover and lay it over. You may have to let the air out of the tire too.
If the linings are contaminated with grease, they must be replaced.
Updated 15 July 2022